Uncategorized

Swing Gate vs Sliding Gate for Residential Driveways: Which One Should You Choose?

Blog & News Swing Gate vs Sliding Gate for Residential Driveways: Which One Should You Choose? jay jay Sep 28, 2026 Article, Uncategorized A complete automated driveway gate installation runs between $4,500 and $12,000 for most residential properties in the South Bay — and the single biggest variable in that range isn’t the material or the brand of opener. It’s the gate style you pick. Swing gate vs sliding gate for residential driveways is the question we hear almost every week, and getting it wrong costs homeowners real money in retrofits and repairs down the road. If you’re planning driveway gate installation San Jose or anywhere nearby, this breakdown will walk you through the actual numbers — labor, hardware, site prep, opener, and overhead — so you can make a confident decision before anyone starts digging. What a Full Driveway Gate Installation Actually Costs — Line by Line Before comparing styles, let’s establish what makes up the total bill. Here’s a realistic line-item breakdown for a mid-range automated residential gate:   Cost Component     Swing Gate     Sliding Gate     Gate panel fabrication     $1,200 – $3,500     $1,500 – $4,500     Opener / operator     $800 – $1,800     $1,200 – $2,500     Post & hinge hardware     $300 – $600     $400 – $900 (track + roller)     Electrical rough-in     $400 – $700     $400 – $700     Concrete & site prep     $350 – $800     $600 – $1,400     Labor (installation)     $900 – $1,800     $1,100 – $2,200     Service call / permit fee     $150 – $300     $150 – $300     Overhead & margin     ~15–20%     ~15–20%     Typical total     $4,500 – $8,200     $5,800 – $12,000       Sliding gates cost more across almost every line. The track system, the heavier operator, and the additional concrete work for a proper foundation all add up. That doesn’t make sliding gates the wrong choice — but it does mean you should have a solid reason to spend the extra money. We’ll get to those reasons shortly. How Swing Gates Work and What They Cost to Install A swing gate is the classic style: one or two panels hinged to posts, swinging inward or outward like a front door. A double swing gate splits the opening across two leaves that meet in the middle. A single-leaf swing gate is common for openings under 14 feet.   What drives the cost on a swing gate:   Hinge quality. Cheap weld-on hinges fail within three to five years under the stress of a 400-lb iron panel. We spec adjustable, heavy-duty commercial hinges on every job we do, which adds $150–$300 to materials but saves a callback later. Post depth. In the Santa Clara Valley, we routinely hit clay soil within 18 inches. A swing gate’s posts carry the full cantilevered weight of the panel, so we pour those footings 36–42 inches deep — sometimes deeper on hillside lots. Expect $150–$300 in extra concrete if your soil is soft or expansive. Operator placement. Underground operators (like a Viking or FAAC unit) are the cleanest-looking option for swing gates and run $1,400–$2,200 installed. Above-ground linear actuators are less expensive at $800–$1,400 installed, but they’re exposed to the elements.   The big swing-gate advantage is simplicity. Fewer moving parts means fewer things that break, and parts are easy to source anywhere. Looking for Affordable Garage & Gate Repairs? We offer quality service at competitive rates. Call (650) 912-1200 today to schedule your repair. How Sliding Gates Work and When They’re the Smarter Choice A sliding gate travels horizontally along a track (or hangs from a cantilever system with no ground track at all). The panel stacks to one side of the opening when open, which requires a clear run of space equal to at least the gate’s full width — plus about 18 inches for the operator.   What drives the cost on a sliding gate:   Track vs cantilever. A ground-track system is cheaper ($400–$900 for hardware) but requires the track to stay clean and level — a problem on properties with leaves, debris, or significant frost heave. A cantilever system eliminates the ground track entirely and runs $700–$1,500 in hardware, but the posts and beam need to be engineered for the load. We almost always recommend cantilever for Bay Area properties. Motor torque requirements. A sliding gate can weigh 600–1,200 lbs on a wide opening, so you need a beefier operator. LiftMaster, Viking, and FAAC all make commercial-grade slide operators, and they range from $1,200 to $2,500 installed. Concrete pad for the stacking zone. The area where the gate slides open needs a hard, level surface. If that zone is currently gravel or lawn, budget $600–$1,200 to pour a proper slab.   For a deeper comparison of Bay Area-specific considerations, our swing gate vs sliding gate guide covers soil movement and coastal humidity factors in more detail. Space, Slope, and Soil: The Site Factors That Often Decide for You Here’s the honest truth: for about 40% of the properties we assess, the yard itself makes the decision — not the homeowner’s preference.   When your site points to a swing gate: You have a flat driveway apron with at least 10–12 feet of clearance in front of (or behind) the gate for the panels to swing without hitting a parked car or a tight turn. Your driveway is level or has a very gentle slope (under 3%). A steeply graded apron means swing panels risk dragging the ground as the hinge settles. Your opening is under 16 feet wide. Wide single-leaf swing gates are ungainly and put enormous stress on hinges.   When your site calls for a sliding gate: Your driveway slopes toward the street — very common on San Jose hillside lots.

Swing Gate vs Sliding Gate for Residential Driveways: Which One Should You Choose? Read More »
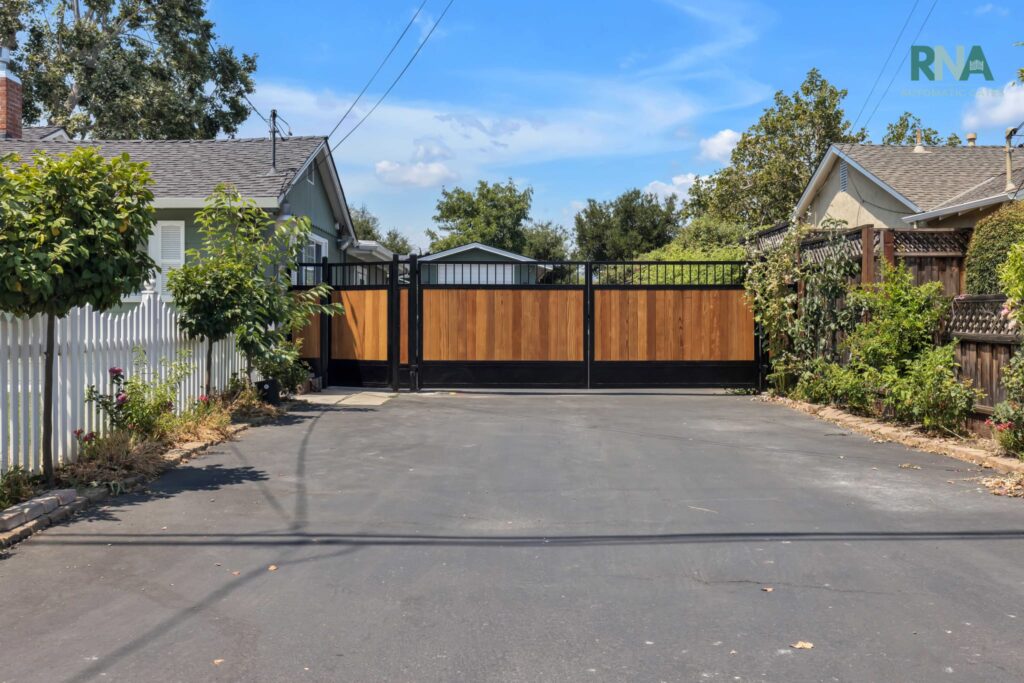
When to Replace a Driveway Gate in Atherton: Signs, Timing, and Who to Call

Blog & News When to Replace a Driveway Gate in Atherton: Signs, Timing, and Who to Call jay jay Sep 28, 2026 Article, Uncategorized Pull up to any well-equipped gate technician’s truck and you’ll see two distinct layers of gear — the diagnostic tools and the heavy replacement hardware. If the tech shows up with only a screwdriver and a multimeter, they’re planning to patch. If you see a full gate panel strapped to the rack, a hydraulic operator box on the floor, and a bag of concrete anchors, they came ready for the real conversation: whether your gate can be saved or whether it’s time to start fresh. Knowing when to replace a driveway gate in Atherton is a question we get almost every week, and the answer almost always starts with what we find during the first 15 minutes on site. If you’re already thinking seriously about a new system, our driveway gate installation Atherton page walks through the full scope of what that project involves. What’s in a Pro’s Truck (And What It Tells You About the Job) The tools a technician carries are a window into how seriously they take gate work. Here’s what you should see, and what each category signals about the complexity of your situation.   Diagnostic Tools   A quality gate tech arrives with a digital multimeter, a loop detector tester, and a photo-eye alignment tool. These let us check voltage at the motor, confirm whether the safety loops buried in your driveway are still reading correctly, and verify that the beam between your photo eyes hasn’t drifted. When all three checks come back clean and the gate still misbehaves, the problem is structural — not electrical.   Repair Tools   Welding leads, a grinder, bearing pulley sets, and a full rack of limit switches cover about 70% of the repair calls we run. A bent hinge, a worn drive wheel on a slide gate, a snapped torsion spring — these are fast fixes when the frame itself is straight and the operator is within its service life.   Replacement Hardware   If the truck carries a spare operator (LiftMaster, FAAC, or Viking), a fresh gate panel, and a concrete-anchor kit, the tech is prepared to make the hard recommendation. A prepared pro doesn’t talk you into a replacement on a repairable gate — but they also don’t waste your time patching a gate that’s going to fail again in three months.   Specialty Items   Custom bracket adapters, hydraulic ram kits, and keypad/access control modules signal experience with higher-end installations. Atherton properties frequently have ornate wrought iron or custom powder-coated aluminum gates paired with sophisticated access systems. A tech without these specialty items on the truck is likely guessing their way through the job. Warning Signs Your Gate Is Trying to Tell You Something Gates don’t fail without warning. They telegraph problems weeks or even months in advance — if you know what to look for.   Grinding or scraping sounds on every cycle. This usually points to worn rollers on a slide gate or failing bearings in a swing arm. Catching it early means a $200 part swap. Ignoring it means the drive motor burns out too, and now you’re looking at $800–$1,200.   The gate moves slower than it used to. Operators are rated for a specific number of cycles per day and a specific weight class. When your gate starts dragging, the motor is working harder than it should. That means heat buildup, shortened brushes, and eventually a seized motor.   Visible rust streaks or paint bubbling along the bottom rail. In the Bay Area, even Atherton’s mild climate produces enough moisture to corrode mild-steel components over time. Surface rust is cosmetic. Pitting rust along a structural weld is a structural problem.   The gate reverses mid-travel for no obvious reason. This is often a safety loop issue or a photo-eye fault, both of which we address in our rundown of common driveway gate issues and how expert repair services can help. But if the reversal persists after those components test clean, the operator’s internal obstacle-detection is tripping on the gate’s own resistance — meaning friction has reached a dangerous level.   Gate posts that have shifted, tilted, or cracked at the base. This is the single biggest warning sign that repair is a band-aid. A gate system is only as solid as its anchors. If the post is moving, every component above it is under stress it wasn’t designed for. Repair vs. Replace: How to Make the Right Call The 50% rule is the clearest framework we use: if the cost to repair a gate exceeds 50% of a comparable new installation, replacement is almost always the smarter investment. You get a warranty, updated safety compliance, and components that aren’t already halfway through their service life.   Here’s how it breaks down in practice:   Operator replacement only — the gate structure is solid, posts are plumb, hardware is tight. A new operator runs $600–$1,500 installed depending on the system. This is a straightforward repair scenario. Gate panel plus operator — the panel is bent, rusted through, or a vehicle has hit it. Now you’re at $2,000–$4,500 depending on material and custom fabrication. At this point, you’re essentially doing a partial installation anyway, so it’s worth pricing a full replacement. Post, panel, and operator — the posts have shifted and the whole system needs to come out. This is a full installation. Do it right, and the new gate will outlast the house. Patch it, and you’ll be calling someone again in 18 months.   For a deeper look at this decision framework, our piece on gate repair or replacement — Cupertino experts weigh in on your options covers the exact questions to ask before you commit either way. The Hidden Culprits Behind Premature Gate Failure We’ve replaced gates that were only five years old because of installation mistakes that doomed them from day one. These

When to Replace a Driveway Gate in Atherton: Signs, Timing, and Who to Call Read More »

How Driveway Gate Installation Works Step by Step: A Los Gatos Homeowner’s Guide

Blog & News How Driveway Gate Installation Works Step by Step: A Los Gatos Homeowner’s Guide jay jay Sep 28, 2026 Article, Uncategorized The rolling hills, oak-lined streets, and estate-style properties of Los Gatos create a very different installation environment than, say, a flat Sunnyvale subdivision — and if you’ve ever wondered what actually happens between the first phone call and the moment your gate swings open for the first time, this is the breakdown you need. If you’re planning driveway gate installation Los Gatos, understanding how driveway gate installation works step by step will help you ask better questions, set realistic timelines, and avoid the surprises that catch unprepared homeowners off guard. How the Process Differs Across the Bay Area — and What That Means for Los Gatos Before getting into the mechanics, it’s worth understanding that no two Bay Area cities run the same playbook on gate installations. The region’s geography, soil conditions, municipal codes, and property styles create genuinely different challenges from one town to the next.   Santa Clara and San Jose (flat, urban grid): Properties here are typically on level ground with consistent soil compaction. Posts go in faster, concrete cures more predictably, and operator placement is almost always straightforward. The bigger challenge is often permit coordination with HOAs or city planning for corner lots.   Atherton and Menlo Park (estate lots, mature trees): These jobs routinely involve designing around century-old root systems, maintaining sight lines for heritage trees, and navigating the town’s strict aesthetic guidelines. We’ve spent more hours on pre-installation landscaping coordination in Atherton than almost anywhere else — our driveway gate installation in Atherton work reflects just how much site-specific planning goes into those properties.   Hillside communities like Los Altos Hills and parts of Saratoga: Sloped driveways demand either a cantilever sliding gate (so the gate doesn’t swing into a hill) or carefully engineered swing gate geometry. The slope also changes how we calculate post depth and concrete volume — a post that’s adequate on flat ground can shift under load on a 12-degree incline.   Los Gatos: This town sits at the edge of the Santa Cruz Mountains, which means many properties combine a moderate slope with clay-heavy or rock-laden soil. Seasonal soil movement from the winter rains is real here. We’ve pulled posts from Los Gatos jobs that showed clear lateral shift after just two wet seasons — because the initial crew didn’t account for expansive clay. That’s the kind of local knowledge that separates a solid installation from a callback six months later.   What carries through everywhere, though, is the sequence of the work. The steps don’t change; the variables inside each step do. The Site Survey: What We’re Actually Looking For Before a Single Post Goes In Every installation we do starts with an in-person site survey. No serious installer should be quoting you a firm price from photos alone — there’s too much under the surface (literally) that changes the scope.   During a survey, here’s what we’re evaluating:   Driveway width and gate opening span: This determines whether a single swing gate, double swing gate, or sliding gate makes sense. Openings under 12 feet almost always go with a single swing; over 16 feet, a slide or bi-parting swing becomes more practical. Grade and slope: We use a level and tape measure to calculate the angle. Anything above 8 degrees significantly affects gate operator selection and post placement geometry. Soil type: We probe the ground. Clay, loam, decomposed granite, and hardpan rock all require different post-setting strategies. Rock means drilling; expansive clay means deeper footings with drainage gravel. Power source: Where is the nearest 110V or 220V circuit? How far does conduit need to run? Are we trenching across a paved driveway (saw-cut and patch) or through a landscaped strip (much easier)? Existing infrastructure: Sprinkler lines, irrigation valves, buried telephone conduit, and lighting wiring all live in the path of a trench. We mark everything before we dig. HOA and permit requirements: Los Gatos has specific setback and height rules for front-yard structures. If your gate exceeds 6 feet or sits within a certain distance of the street, a permit is typically required. We handle that paperwork, but the survey is where we flag it.   The survey takes 30 to 60 minutes. It’s not a formality — it’s the foundation of an accurate quote and a clean installation. Material and Gate Style Selection: Where Most Homeowners Spend the Most Time Once we have the site data, the conversation shifts to what you actually want the gate to look like and how you want it to operate. These two decisions interact with each other more than most people expect.   Gate Style: Swing vs. Slide   On flat or gently sloped Los Gatos driveways, a swing gate is usually the most cost-effective and visually elegant choice. It’s mechanically simpler and the operators have fewer moving parts to maintain. On steeper driveways or properties with limited side clearance, a sliding cantilever gate is the right call. We cover the full trade-off breakdown in our post on swing gate vs sliding gate for Bay Area homes — worth a read before you commit.   Material: Iron, Aluminum, or Wood   Wrought iron and steel: Maximum strength, fully weldable, and holds paint well. Heavier weight means you need a more robust operator. In Los Gatos’s wet winters, proper powder coating is non-negotiable — bare steel rusts within one season here. Aluminum: Lighter, rust-proof, and surprisingly rigid in structural profiles. Operators don’t need to work as hard, which extends motor life. The trade-off is that aluminum can’t be welded for repairs as easily as steel. Wood (cedar or redwood): Beautiful and very common in the Los Gatos hills aesthetic. Wood gates require a steel frame hidden inside the woodwork, otherwise they sag within a year or two. Maintenance commitment is higher — plan on re-sealing every two to three years. Looking for Affordable Garage & Gate Repairs?

How Driveway Gate Installation Works Step by Step: A Los Gatos Homeowner’s Guide Read More »

How Much Does Driveway Gate Installation Cost in Santa Clara

Blog & News How Much Does Driveway Gate Installation Cost in Santa Clara jay jay Sep 28, 2026 Article, Uncategorized The moment a repair estimate crosses 60% of what a brand-new gate costs, replacement almost always wins — financially and practically. If you’re asking how much does driveway gate installation cost in Santa Clara, you’re probably standing at exactly that crossroads: an aging gate that’s nickel-and-diming you, or a property upgrade you’ve been putting off. Either way, understanding real price ranges before you call anyone puts you in control. For a full overview of your options, our driveway gate installation Santa Clara page walks through the service in detail — but this article is specifically about the dollars and what drives them. When Repair Stops Making Financial Sense and Replacement Wins This is the decision most homeowners get wrong because they only see today’s repair bill, not the pattern.   The 60% rule: If repairing your existing gate costs 60% or more of what a comparable new gate would cost installed, buy new. You’ll spend the same money either way, but a new gate comes with a warranty, modern safety features, and zero deferred maintenance.   Age and condition factors matter more than the repair quote. A 6-year-old gate with a snapped hinge is a clear repair candidate — one fix, you’re done. A 15-year-old gate with a corroded frame, a struggling motor, and worn rollers is a different story. That motor repair alone might run $350–$550, but in six months you’ll be back for the rollers ($200–$400) and then the control board ($300–$600). Add those up and you’ve quietly paid for a new gate.   Real-dollar examples we see regularly in Santa Clara:   Swing gate with broken weld on the frame: repair $275–$450. Gate is 4 years old, otherwise solid. Repair wins. Sliding gate with seized track, worn drive gear, and a 12-year-old opener: repair estimate $900–$1,200. New comparable gate installed: $1,800–$2,400. Replacement wins. Ornamental iron double gate, heavy rust, motor dead: repair and refinishing $1,100–$1,500. New custom iron gate installed: $2,500–$3,500. Replacement wins — and you get a gate that actually fits your home.   When to override the rule: If your existing gate has significant custom fabrication — hand-forged ironwork, a design matched to historic architectural details — reproduction cost can push well past $5,000. In that case, aggressive restoration can be worth it even when the percentage math says replace. We’ve seen this on older estates in Santa Clara where the gate is part of the property’s identity. What Driveway Gate Installation Actually Costs in Santa Clara Let’s cut through the vague ranges you’ll find elsewhere. Based on the jobs we run in this market, here’s what installation actually looks like:   Entry-level single swing gate (steel or aluminum, basic automation): $1,800–$2,800 installed. This covers a pre-fabricated panel, standard hinges, a mid-tier swing operator, and basic keypad entry. Good for a side yard or a budget-conscious primary driveway.   Mid-range double swing gate (ornamental iron or aluminum, full automation): $3,500–$6,500 installed. This is the most common bracket for Santa Clara residential driveways. You’re getting a fabricated gate, a quality dual swing operator (LiftMaster, Viking, or equivalent), photo eyes, and a vehicle loop or intercom.   Sliding gate (residential, 12–16 ft opening): $4,000–$7,500 installed. Sliding gates cost more because the hardware is heavier — V-track or cantilever systems, a more powerful motor, and more labor. Properties with sloped driveways often have no choice but to go sliding, which is worth knowing upfront.   Custom ornamental iron or steel (fabricated to spec): $6,000–$15,000+ installed. Once you’re ordering custom fabrication — specific panel heights, decorative finials, powder-coat colors, or architectural matching — the range widens significantly. Material and fabrication time drive the high end.   Permit costs in Santa Clara: Budget $150–$400 for permit fees depending on gate height and whether the installation is residential or commercial. We handle the permit process for our customers, but it’s a real line item you should expect. The Biggest Factors That Drive Your Final Price Up or Down If two neighbors get wildly different quotes for what seems like the same gate, these are usually why:   Driveway width. A 10-foot single-car opening costs meaningfully less than a 20-foot double-car opening. More steel, more hardware, more labor. Simple as that.   Slope and terrain. A flat, level driveway is the easiest install we do. A sloped driveway often requires a sliding gate or special swing-gate geometry, adds engineering time, and sometimes requires concrete work to create a level track base.   Existing infrastructure. Does your property already have a post foundation, conduit runs, and a 120V outlet near the gate location? If yes, installation costs drop. If we’re running new electrical, digging post footings, or pouring concrete, add $500–$1,500 to the baseline.   Access control complexity. A basic keypad is cheap. A video intercom, smartphone app integration, license plate recognition, or multi-user access control system adds anywhere from $400 to several thousand dollars depending on the system. We cover this in more detail in the automation section below. Looking for Affordable Garage & Gate Repairs? We offer quality service at competitive rates. Call (650) 912-1200 today to schedule your repair. Gate Material and Style: Where Most of Your Budget Goes Material choice is often the single largest cost variable. Here’s how the main options stack up for Santa Clara homeowners:   Ornamental Iron (Wrought Iron or Steel) The most popular choice for curb appeal. Powder-coated steel or true wrought iron runs $80–$180 per linear foot for the gate panel alone before hardware or installation. It’s heavy, durable, and looks premium — but it needs periodic touch-up on the coating to prevent rust, especially in our marine-influenced Bay Area air.   When you’re comparing iron to aluminum, our guide on choosing the right gate material breaks down the long-term maintenance differences in plain language.   Aluminum Lighter than steel, rust-proof, and increasingly popular for residential installs. Panel cost runs $60–$130 per

How Much Does Driveway Gate Installation Cost in Santa Clara Read More »

Swing Gate vs Sliding Gate: Which Is Better for Bay Area Homes

Blog & News Swing Gate vs Sliding Gate: Which Is Better for Bay Area Homes jay jay Aug 27, 2026 Article, Uncategorized You’ve decided to add an automatic gate to your driveway — now the next question stops a lot of homeowners cold: swing gate vs sliding gate, which is better for Bay Area homes? The answer isn’t universal. It depends on your driveway slope, the width of your entrance, your budget, and how much maintenance you’re actually willing to do. Here’s the honest comparison I give every customer before we touch a single post-hole. The Honest DIY vs. Pro Trade-Off Matrix for Gate Installation Before we compare gate types, let’s talk about who should be installing either one. I get asked regularly whether a capable DIYer can handle this project.   Cost matrix: A mid-grade swing gate kit runs $800–$1,800 in materials. A sliding gate kit is $1,200–$2,500. Either way, professional labor adds $1,500–$3,500 depending on site prep. If you’re budget-limited and the site is simple — flat ground, no existing concrete to break up, clear post locations — DIY can save real money on swing gates specifically.   Risk matrix: Sliding gates require a buried track or a cantilever system with precise engineering. Mis-set a track by half an inch and the gate binds or derails inside six months. Swing gates are more forgiving in that sense, but hitting the wrong underground utilities during post installation is a universal risk. We’ve been called out to fix DIY jobs where someone hit irrigation lines or conduit — the “savings” evaporated fast.   Time matrix: A two-post swing gate install by a pro crew takes 4–8 hours. A sliding gate with concrete track-base work takes 1–2 full days. For a first-time DIYer, double those numbers and budget for at least one problem-solving trip to the hardware store.   Decision rules: Flat lot, single-panel gate under 12 feet, you’re comfortable with concrete work → DIY swing gate is reasonable. Any slope over 5 degrees, driveway wider than 16 feet, or you want a cantilever slide → hire a professional. Automated opener wiring in California requires permit compliance either way — factor that in. How Swing Gates Work — and Where They Thrive A swing gate pivots on two posts, opening inward or outward like a door. You can run a single panel (one leaf) up to about 16 feet, or a dual-leaf pair for wider entries. The automation is a linear actuator or underground ram — both are reliable, serviceable, and parts are widely available.   Where swing gates are the right call:   Flat or near-flat driveways. Swing gates need a clear arc to open. On a level lot, a 14-foot dual-leaf gate swings open in about 5 seconds with a quality actuator. Shorter driveways. If you’re pulling up and stopping within 10–12 feet of the gate, an outward-swinging gate needs room in the street — check your local setback rules. Inward swing solves this if you have the depth. Tighter budgets. Posts, hinges, and actuators are simpler and less expensive than the hardware required for a heavy sliding gate system. Classic aesthetics. Wrought iron and ornamental steel swing gates look proportionally right on most residential Santa Clara County lots. Check our gallery of completed projects to see how they photograph against typical Bay Area architecture.   Where swing gates struggle: Any driveway with a significant incline. If your driveway slopes upward from the street, an inward-swinging gate drags on the pavement as the ground rises. You can arc the gate panels to accommodate a modest slope, but beyond about 8–10 degrees the geometry stops working and you’re looking at a gap at the bottom of the arc — a security and aesthetics problem. How Sliding Gates Work — and Where They Shine A sliding gate rolls laterally along a track (or hangs from a cantilever beam) parallel to your fence line. There’s no pivot arc, which removes the slope constraint entirely. The automation is a rack-and-pinion motor — more torque for heavy gates, quieter operation in many cases, and very low maintenance on the drive mechanism itself.   Where sliding gates are the right call:   Sloped driveways. This is the most common reason we spec a slider in the Bay Area. Hillside neighborhoods in Los Gatos, Cambrian Park, and similar areas have driveways that a swing gate simply can’t handle cleanly. For properties needing gate installation in Los Gatos, sliders come up in probably 60% of site assessments. Narrow street frontage. No arc means no intrusion into the road or neighboring property. If your setback is tight, a slider keeps everything on your side of the property line. Wide commercial-style entries. Spans over 20 feet are almost always sliding gate territory. The structural load on swing-gate hinges and posts at that width creates long-term sag issues — we’ve replaced a lot of bent hinge posts on undersized swing-gate installations. High-traffic driveways. Rack-and-pinion motors handle repeated cycles better than linear actuators under heavy daily use.   Where sliding gates struggle: They need a clear run of fence line at least 1.5× the gate width to park the panel when open. A 16-foot gate needs roughly 24 feet of unobstructed fence to slide into. If your property has a perpendicular wall, a corner post, or a utility box in that run, a cantilever system (no ground track) solves it — but costs more. Slope, Space, and Soil: The Bay Area Factors That Tip the Decision The Bay Area throws a specific combination of variables at gate installers that you won’t find in, say, flat Central Valley towns.   Slope: As mentioned, anything above 5–8 degrees of incline makes swing gates problematic without custom fabrication. Bay Area hillside neighborhoods regularly hit 15–20 degrees. Sliding gates handle this natively.   Clay soil expansion: Expansive clay soils — common throughout Santa Clara County — shift seasonally. Post footings for swing gates need to go deeper (typically 36–42 inches with a bell-bottom footing)

Swing Gate vs Sliding Gate: Which Is Better for Bay Area Homes Read More »

When to Replace a Driveway Gate in Los Gatos: Signs, Timing & Repair vs. Replace

Blog & News When to Replace a Driveway Gate in Los Gatos: Signs, Timing & Repair vs. Replace jay jay Aug 27, 2026 Article, Uncategorized Most homeowners think a gate service call takes a couple of hours, tops. In reality, how long it takes depends heavily on what’s actually wrong — and whether you caught it early or let it go. Here’s what a realistic service timeline looks like before we get into the signs that tell you something is wrong:   Typical repair and replacement time benchmarks: Sensor realignment — 20–40 minutes — straightforward if nothing else is damaged Gate opener motor swap — 1.5–3 hours — varies by brand, wiring condition, and mounting style Single panel hinge repair — 45–90 minutes — longer if the post has shifted or cracked at the base Full single gate replacement — 4–6 hours — includes removal, new post work if needed, panel hang, and opener programming Double gate replacement with new opener — 6–10 hours, sometimes split across two days — concrete work, post setting, and curing time all factor in   Knowing these benchmarks matters because when to replace a driveway gate in Los Gatos is rarely a snap decision. If you’re already spending 3+ hours on a repair that still won’t hold, replacement starts to look a lot more economical than another service call six months from now. How Long Gate Repairs Actually Take (vs. What People Expect) When we get this call — “it’s just making a grinding noise, it should be a quick fix” — we already know it might not be. Grinding usually means the drive gear or the chain sprocket has been running rough for a while. By the time it’s loud enough for you to notice, the internal components have often been taking a beating for months.   The same is true for gates that “just stop” mid-open. That’s rarely a single failed part. More often it’s a cascade: a weak battery lets the board brown out, which causes the motor to stall under load, which eventually burns the capacitor. A job that looks like a 30-minute battery swap can turn into a 2-hour board and capacitor replacement once we’re inside the housing.   The point isn’t to scare you — it’s to set realistic expectations so you can plan your day and your budget properly. Early intervention almost always means shorter, cheaper repairs. Waiting almost always means the opposite. Five Warning Signs Your Gate Is Telling You Something Is Wrong After more than a decade of gate work across Santa Clara County, these are the five signs we see most often right before a gate fails completely:   1. It Hesitates Before Moving A half-second pause before the gate starts to travel used to mean nothing. Now if it’s taking two or three seconds to respond to the remote, that’s the opener working harder than it should. The motor is compensating for either a mechanical drag issue (worn rollers, bent track, misaligned hinges) or a failing capacitor that can’t deliver the startup current it used to.   2. The Gate Reverses for No Reason Auto-reverse is a safety feature — but if your gate reverses when there’s nothing in its path, the safety loop or photo-eye sensors are reading a phantom obstruction. Sometimes it’s a misaligned sensor. Sometimes it’s a corroded ground wire causing intermittent false signals. Either way, it needs attention before it gets worse.   3. Visible Rust or Cracking at the Frame Welds Surface rust on a wrought iron gate is cosmetic. Rust at the weld points — where vertical pickets meet horizontal rails, or where the hinge plates attach — is structural. We’ve seen panels separate at the weld entirely when a gate swings open. In Los Gatos, where morning fog and heavy dew are common, frame corrosion tends to move faster than people expect.   4. The Gate Sags or Drags on the Ground A gate that drags means the hinge is failing, the post is leaning, or the panel has warped. The first time it drags lightly, you can often correct it with a hinge adjustment. The third or fourth time? The post may have shifted in the ground, which is a foundation repair, not just a hardware fix.   5. Intermittent Operation You Can’t Predict If your gate works fine on Monday and refuses to open on Tuesday for no apparent reason, that randomness is the hardest problem to ignore. It usually points to a failing control board, a corroded wire connection, or a receiver that’s losing range. Intermittent failures almost never resolve on their own — they escalate. Looking for Affordable Garage & Gate Repairs? We offer quality service at competitive rates. Call (650) 912-1200 today to schedule your repair. Repair vs. Replace: How to Make the Right Call Here’s the honest version of this conversation: if a repair costs more than 50–60% of what a replacement would cost, replacement is almost always the smarter move. You’re not just paying for the new gate — you’re buying years of reliable operation without the diminishing returns of patching aging hardware.   That said, not every aging gate needs to go. A solid steel or wrought iron panel with good bones can often be saved with a hinge rebuild, a fresh weld, and a new opener. We’ve extended gate life by five or more years with a targeted repair that cost a fraction of replacement.   The questions we ask on a service call are: How old is the gate? What’s the structural condition of the frame and posts? Is this the first major repair or the third in two years? Is the opener still supported by its manufacturer, or are parts becoming hard to source?   If you’re getting yes answers to the last two questions, replacement is the right call. If you’re browsing options for Gate Installation Los Gatos, you’ll find that modern gate systems — especially automatic sliding gates and swing gates with

When to Replace a Driveway Gate in Los Gatos: Signs, Timing & Repair vs. Replace Read More »

How Driveway Gate Installation Works Step by Step: A Campbell Homeowner’s Guide

Blog & News How Driveway Gate Installation Works Step by Step: A Campbell Homeowner’s Guide jay jay Aug 27, 2026 Article, Uncategorized A homeowner on Hacienda Avenue in Campbell called us last spring about a gate project that had already gone wrong once. A previous crew had set the posts, hung a heavy dual-swing iron gate — and then the operator failed within three weeks. The homeowner was out $2,400 in labor and facing a gate that swung open on its own at 2 a.m. The stakes were real: a young family, a dog that bolted, and a car parked in the driveway that had been bumped twice by the runaway panel. When we arrived for the diagnostic, the problem was clear within ten minutes — the conduit run was crushed under a post footing, the operator was wired without a dedicated circuit, and the post depth was 18 inches on soil that needed at least 30. Everything had to come out and start over.   That job taught me something worth sharing: understanding how driveway gate installation works step by step saves homeowners from exactly this kind of expensive do-over. When you know what a proper process looks like, you can ask the right questions before you sign anything. A Real Campbell Job That Almost Went Sideways — Before It Went Right After we pulled the failed installation, the homeowner’s budget was tight. We had to be efficient and accurate — no room for surprises. The driveway opening measured 14 feet, the slope was a 3-inch drop from left to right, and the existing concrete apron was in good shape but needed to be cored rather than jackhammered to protect it.   We proposed a single slide gate in powder-coated steel with a linear operator and a keypad plus loop detector combo. Total project cost on the redo: $6,800 all-in, including demo of the original failed installation. Timeline: one full day for structural work, a second morning for electrical and programming.   The outcome — the gate has been running daily for eight months without a single service call. That’s the standard every installation should hit. What Happens Before a Single Post Gets Set Good gate installation is 40% planning. Before any digging starts, here’s what a proper site assessment covers:   Measuring the opening and the swing or slide path. For a swing gate, we check that both panels have clear arc room — no slope changes, no planting, no downspouts in the path. For a slide gate, we confirm there’s at least 1.5 times the gate width of run space along the fence line.   Soil and footing conditions. In the South Bay, we see a mix of heavy clay near creek corridors and looser decomposed granite on hillside lots. Clay holds moisture and moves seasonally — that means deeper footings and, sometimes, a larger footing diameter to prevent lean over time. We check this before we quote, not after.   Utility markings. We always call for utility locates before any digging. Gas, irrigation, and low-voltage lines hide in driveway aprons more often than homeowners expect — especially on properties that have had landscaping work done over the years.   Permit requirements. In Campbell and neighboring areas like Los Gatos, a gate over a certain height or with an operator often requires a building permit. We pull it, not the homeowner. This protects you at resale and makes sure the installation meets current code.   For customers who want to see finished projects before committing, our gallery shows real completed jobs across the South Bay — a useful reference when you’re choosing style and material. How the Posts and Framework Go In Post-setting is the step that determines whether a gate runs smoothly for decades or starts sagging in year two.   Post sizing and placement   For a steel swing gate, we use a minimum 4×4-inch square steel post, typically 3/16-inch wall thickness, set at a depth that accounts for both the gate weight and local frost/soil movement. In Campbell, 30–36 inches is our standard for anything over 200 lbs per panel.   We core or dig, drop in the post plumb using a level on two faces simultaneously, and pack with concrete. We let it cure — at minimum overnight, preferably 24–48 hours — before we hang any weight on it. This is the step that most rushed crews skip, and it’s usually the reason gates go out of square within a season.   Slide gate track and cantilever systems   For slide gates, we set a heavy concrete pad or use a cantilever system that keeps the gate off the ground entirely. Cantilever is more expensive upfront but nearly eliminates track-clogging issues — particularly valuable on properties where debris or standing water is a factor. Looking for Affordable Garage & Gate Repairs? We offer quality service at competitive rates. Call (650) 912-1200 today to schedule your repair. Running Conduit, Power, and the Gate Operator This is where electrical work intersects with gate mechanics, and it’s where many DIY or budget installations cut corners.   Dedicated circuit. A gate operator needs its own 20-amp circuit. Sharing a circuit with outdoor lighting or an outlet causes nuisance tripping and can damage the operator’s control board over time. We coordinate with a licensed electrician if the panel work exceeds our scope, or we include it in our crew’s work when we’re handling the full project.   Conduit routing. All low-voltage and line-voltage conduit goes underground, sleeved in schedule-40 PVC, and routed before the post footings cure — never after, which is what caused the crushed conduit on that Hacienda Avenue job. We mark conduit depth and location on a simple site sketch we leave with the homeowner for future reference.   Operator selection. The operator choice depends on gate weight, cycle frequency, and power availability. A residential swing gate used 10–15 times a day is a very different load than a commercial slide gate cycling 80+

How Driveway Gate Installation Works Step by Step: A Campbell Homeowner’s Guide Read More »

How Much Does Driveway Gate Installation Cost in Cambrian Park

Blog & News How Much Does Driveway Gate Installation Cost in Cambrian Park jay jay Aug 27, 2026 Article, Uncategorized         A homeowner on Stokes Avenue in Cambrian Park called us last spring with a straightforward request: she wanted a single swing gate at the end of her concrete driveway to keep the dog in and deliveries out. She’d already gotten one quote — $4,200 — and wasn’t sure if that was fair. By the time we finished the site visit, measured the 12-foot opening, checked the slope of her driveway, and talked through her options, she understood exactly why that number was what it was. She ended up paying $3,850 for a powder-coated aluminum swing gate with a LiftMaster opener, and she was on the phone with a neighbor about it within a week. So when people ask how much does driveway gate installation cost in Cambrian Park, the honest answer is: it depends — but there’s a clear framework for figuring it out. Let’s walk through that framework the same way I would with any homeowner standing in their driveway. A Real Cambrian Park Install: What One Homeowner Actually Paid The Stokes Avenue job was a good example of a mid-range residential install. Here’s how the numbers broke down: Gate material and fabrication: $1,400 (single-leaf aluminum, powder-coated black) LiftMaster swing gate operator: $750 Posts, concrete footings, and hardware: $480 Labor (4.5 hours for two technicians): $720 Keypad access entry system: $300 Miscellaneous (conduit, wiring, connectors): $200 Total: $3,850 That’s a typical single-gate automated install in our area. If she had chosen wrought iron instead of aluminum, we’d have been closer to $5,200. If she’d wanted a sliding gate — which the site’s slope actually made more practical — add another $600–$900 for the operator and track hardware. The lesson here isn’t the final number. It’s that each line item has a real reason behind it, and understanding those reasons is how you evaluate any quote you receive. The Biggest Factors That Drive Gate Installation Costs Up or Down After 10+ years doing Gate Installation Cambrian Park and across Santa Clara, these are the variables that move the needle most: Driveway Width A standard single driveway opening runs 10–12 feet. Double driveways push 16–20 feet. Every extra foot costs more in material, and double gates require two operators instead of one — which nearly doubles the automation cost. Site Conditions Cambrian Park has a mix of flat lots and properties with noticeable grade changes. A sloped driveway almost always rules out a swing gate (it would drag on the ground at the bottom of the arc) and pushes you toward a sliding gate — which requires a longer track, more groundwork, and a more powerful motor. That adds $600–$1,200 to a comparable project. Existing Infrastructure Do you have a 110V outlet within 50 feet of the gate location? If not, we’re running conduit and adding a circuit, which typically costs $300–$600 depending on distance from the panel. Many older Cambrian Park homes were built without exterior electrical near the driveway, so this comes up more than you’d think. Permit Requirements Santa Clara County may require a permit for gate installations that involve structural footings or electrical work. We handle the filing when needed, but the permit fee (usually $150–$350) does get passed through to the client. Gate Material Costs: Wood, Wrought Iron, Aluminum, and Steel Compared The gate itself is almost always the single largest line item. Here’s a realistic breakdown for a standard 12-foot residential gate in Cambrian Park: Material Gate Cost (Supply Only) Pros Watch Out For Wood $800–$1,600 Natural look, customizable Warps, swells, needs regular sealing in Bay Area humidity Aluminum $900–$1,800 Lightweight, rust-proof, low maintenance Less robust than steel at lower price points Wrought Iron $1,400–$2,800 Classic look, very durable Heavier (needs stronger operator), can rust if coating is damaged Steel (tubular) $1,200–$2,400 Strong, versatile finishes Heavier than aluminum, needs quality coating to resist rust We recommend aluminum to most residential clients in Cambrian Park unless they specifically want the look of wrought iron. Aluminum handles our marine-influenced air far better over time, and it’s significantly lighter — which means less stress on the motor and longer operator life. Automatic vs. Manual Gates: How Automation Changes the Price A manual gate (no opener, just hinges and a latch) can run as low as $1,200–$2,000 fully installed. That’s a real option for a side yard or a property with very light traffic. But the majority of driveway gates we install in Cambrian Park are automated, and for good reason. An opener adds $600–$1,500 to the project cost depending on the brand and gate type, but it pays for itself in convenience within months. No getting out of your car in the rain, no worrying whether you remembered to close it. Here’s a quick operator cost guide by gate type: Single swing gate operator: $550–$900 installed Dual swing gate operators: $1,000–$1,600 installed (one motor per leaf) Sliding gate operator: $750–$1,200 installed Vertical lift or bi-fold operator: $1,400–$2,200 installed Access control adds another layer of cost. A simple keypad is $200–$350. A keypad with intercom runs $400–$700. Video intercoms integrated with your phone start around $800. For commercial properties, card readers and multi-user access control systems can reach $2,000–$4,000 for the control layer alone. For a broader look at what’s possible across the region, our driveway gate installation Bay Area page covers the full range of systems we install. Looking for Affordable Garage & Gate Repairs? We offer quality service at competitive rates. Call (650) 912-1200 today to schedule your repair. Hidden Costs That Catch Homeowners Off Guard I want to be straight with you about a few things that don’t always show up in an initial quote — not because contractors are being sneaky, but because some variables only become clear on the actual site visit. Demolition of an existing gate or fence section. If you’re replacing an old gate or need to

How Much Does Driveway Gate Installation Cost in Cambrian Park Read More »

Sliding vs Swinging Industrial Gates: Which Type to Pick for Your Facility

Blog & News Sliding vs Swinging Industrial Gates: Which Type to Pick for Your Facility jay jay Jul 27, 2026 Article, Uncategorized “Should I get a sliding gate or a swinging gate?” Plenty of people treat that like a style question — the kind of thing you decide with a quick look at a catalog photo. But when you’re specifying a gate for an industrial or commercial facility, that question touches on clearance geometry, vehicle throughput, wind load, ground conditions, power requirements, and long-term maintenance budgets. It’s actually one of the smartest questions a facility manager can ask early in the process.   So let’s answer it properly. This guide walks through how sliding vs swinging industrial gates which type to pick really comes down to your specific site — not personal preference. By the end, you’ll know which variables matter most and why, and you’ll be in a much better position to have a productive conversation with an installer. Why This Question Is More Advanced Than It Sounds   When we get this call at RNA Automatic Gates, we know the person on the other end has already done some thinking. They’re not asking “what is a gate?” — they’re asking about a real engineering trade-off that trips up even experienced contractors.   Here’s why it matters so much at the industrial scale: a residential driveway gate that’s 10 feet wide and weighs 200 lbs is forgiving. If you pick the wrong style, the inconvenience is minor. But a 30-foot industrial gate running heavy steel, handling 50–100 vehicle passes per day, and securing a facility with serious liability exposure? A wrong choice costs tens of thousands of dollars to redo, plus downtime and disruption to operations.   Both gate types have genuine strengths. Neither is universally better. The right answer always comes from reading the site. How Sliding Industrial Gates Work — and Where They Shine   A sliding gate travels laterally along a track, moving parallel to the fence line rather than swinging outward or inward. At the industrial level, you’ll typically encounter two sub-types:   V-Track Sliding Gates These run on a bottom-mounted steel V-groove track embedded in the pavement. They’re extremely stable and can handle gates weighing several thousand pounds. The downside is that the track collects debris — gravel, mud, ice — which needs regular clearing to avoid drive motor strain.   Cantilever Sliding Gates A cantilever design has no bottom track at all. The gate is supported by rollers mounted to posts on one side, and the gate itself extends past the opening by roughly 50–60% of its own width as a counterbalance. These are the gold standard for most industrial applications because they handle uneven terrain, don’t accumulate debris in a track, and perform reliably in wet or muddy conditions.   Where sliding gates shine: Sites with limited setback on either side of the opening (no room for swing arc) High-traffic facilities where speed of operation matters (a well-tuned cantilever can cycle in 8–12 seconds for a 20-foot gate) Locations subject to high wind, since the gate doesn’t present a flat sail to lateral gusts when open Sloped driveways where a swinging gate would drag or bind against the grade   We’ve installed cantilever sliding gates at warehouses, distribution centers, and manufacturing yards throughout the South Bay, and they consistently outperform swing gates in high-cycle, heavy-use environments. How Swinging Industrial Gates Work — and When They Win   A swinging gate pivots on hinges — either inward, outward, or as a bi-parting pair that splits in the middle. Industrial swing gates use heavy-duty hinge posts and commercial-grade actuators or hydraulic operators rather than the residential arms most homeowners are familiar with.   Single-Leaf Swing Gates Best for narrower openings up to about 16–18 feet. A single panel keeps the hardware simple and the cost lower.   Bi-Parting (Dual) Swing Gates For wider industrial openings, two panels meeting in the center cut the swing arc roughly in half. A 30-foot opening with bi-parting gates only requires about 15 feet of clearance on each side rather than a full 30-foot arc.   Where swing gates win: Sites with wide, flat, level aprons on one or both sides of the opening with ample clearance Locations where the total opening width makes a cantilever counterbalance impractical (very wide openings require an enormous run of fence to park the gate against) Facilities that need a more formal or architectural appearance at a main entrance Budget-constrained projects where simplicity of hardware reduces upfront cost   We’ve installed swing gates at gated corporate campus entrances and light-industrial parks in the area where the aesthetic mattered as much as the function, and they were absolutely the right call in those contexts. Check out our project gallery for real examples of both gate types installed at commercial and industrial facilities. Looking for Affordable Garage & Gate Repairs? We offer quality service at competitive rates. Call (650) 912-1200 today to schedule your repair. The Real Trade-Offs: Space, Speed, Maintenance, and Cost   Let’s put the comparison side by side where it counts most.   Clearance and Footprint A swinging gate needs a clear arc equal to its own width. A 20-foot single-leaf gate needs 20 feet of unobstructed space behind it (or in front, if outswing). Parking, loading docks, or fencing within that arc eliminates swing as an option. A cantilever sliding gate needs roughly 1.5× the gate width of fence run alongside the opening — a 20-foot gate needs about 30 feet of adjacent fence line. In tight urban industrial lots, neither option is free — you have to measure both clearances honestly.   Cycle Speed Sliding cantilever gates generally cycle faster under power, which matters at facilities processing dozens of trucks per hour. A hydraulic swing actuator can match speed, but the hardware cost climbs significantly. For high-throughput applications, sliding wins on speed-per-dollar.   Maintenance Profile Swing gates have fewer moving parts, but the hinges and actuator arms bear enormous

Sliding vs Swinging Industrial Gates: Which Type to Pick for Your Facility Read More »

Signs Your Industrial Gate Needs Repair or Replacement (And When to Call a Pro)

Blog & News Signs Your Industrial Gate Needs Repair or Replacement (And When to Call a Pro) jay jay Jul 27, 2026 Article, Uncategorized Over the past five years, the industrial facilities we service around Mountain View and the South Bay have gotten noticeably more complex — more automation, more access control layers, heavier gate panels to handle larger delivery vehicles. That shift has been great for security and operational flow, but it has also raised the stakes when something goes wrong. A gate that would have just been a nuisance to fix in 2019 can now mean a full facility lockout, a compliance gap, or a forklift traffic jam at the loading dock. Knowing the signs your industrial gate needs repair or replacement before things escalate is the single most valuable thing a facility manager can learn. How Industrial Gate Problems Have Changed Over the Last Five Years   When we started seeing more integrated access control systems, loop detectors, and high-cycle operators installed on commercial and industrial properties, the failure modes changed too. Problems that used to be purely mechanical — a bent track, a worn wheel, a snapped spring — now show up as electronic faults first. A gate controller throwing an error code is often the only warning you get before the system shuts down entirely.   Older industrial sites often had gates built for a different era of use. A single-shift warehouse that now runs 24/7 to handle e-commerce fulfillment is cycling that gate far more than its operator was rated for. We’ve seen operators rated for 150,000 cycles reach that number in under three years on busy sites. The nameplate on the motor housing doesn’t lie — but nobody checks it until the gate stops dead on a Tuesday morning.   The takeaway for facilities in the Mountain View area: the trend toward heavier automation means you can’t rely on a gate visibly breaking before you act. The warning signs are subtler now, and they arrive earlier. Warning Signs Your Industrial Gate Is Failing   These are the signals we look for — and the ones your maintenance team should be watching for between service visits.   The Gate Is Slowing Down or Hesitating   An industrial slide gate or swing gate that used to open in eight seconds and now takes twelve is telling you something. It could be a worn drive chain, low hydraulic fluid, a motor drawing excessive amperage, or even debris in the track. Any of these will get worse. A gate that hesitates is also a safety hazard, especially on busy loading docks where drivers are timing their approach.   You’re Hearing New Noises   Grinding, squealing, clunking, or any rhythmic knocking during operation is not normal. Metal-on-metal contact usually means a roller, bearing, or track component has worn past its serviceable limit. Catching this early means a parts swap. Ignoring it means the worn component damages adjacent parts, and a $120 roller becomes a $900 track replacement.   The Gate Is Misaligned or Sagging   A slide gate that drags on the ground or a swing gate that no longer closes flush with the stop post has a structural problem. This can be as simple as a shifted post or as serious as a failing cantilever carriage. Misalignment also puts uneven stress on the operator — you’re essentially asking the motor to fight the gate’s own weight every cycle.   Remote Controls or Access Cards Are Becoming Unreliable   Intermittent access control failures are one of the most frustrating signs your industrial gate needs repair or replacement — or at minimum, a diagnostic visit. If vehicles are being denied access randomly, or if the gate opens halfway and reverses, the issue could be in the receiver, the loop detector, the control board, or the safety edge. Don’t assume it’s the remote before a technician tests the whole system.   Visible Rust, Corrosion, or Physical Damage   Industrial gates take a beating from forklifts, weather, and daily use. Surface rust on a steel frame is cosmetic. But rust that has pitted through a structural member, or a panel that has been struck and bent, compromises the gate’s integrity. A damaged gate panel also undermines perimeter security — which is the whole point of having the gate. Repair vs. Replace: How to Make the Right Call   This is the question we get on nearly every service call for an older industrial gate, and there’s no universal answer. Here’s the framework we use.   Repair makes sense when: The gate frame and track are structurally sound The operator is under 10 years old or within its rated cycle count The repair cost is below 40–50% of a new gate’s installed price The failure is isolated to one component (a motor, a board, a broken weld)   Replacement makes more sense when: The gate has been repaired repeatedly in the last two years and the same systems keep failing The frame is corroded or damaged beyond a clean weld repair The operator is obsolete and replacement parts are backordered or discontinued Your operational needs have changed — heavier vehicles, higher cycle count, new access control requirements — and the existing gate simply wasn’t designed for it   We’ve worked on sites where a $3,500 repair on a 15-year-old gate was the right call because the frame was solid and the operator was easy to source. We’ve also talked facility managers out of a repair when the gate had a compromised header post and two prior motor replacements in four years. At that point, a full replacement delivers better ROI over the next decade.   You can see examples of how proper industrial gate installations are built to last in our project gallery — the difference between a well-engineered system and a patched-up one is visible in the hardware. The Hidden Costs of Delaying Industrial Gate Service   Waiting to address a failing industrial gate doesn’t just risk a breakdown —

Signs Your Industrial Gate Needs Repair or Replacement (And When to Call a Pro) Read More »