jay jay

Gate Installation Cambrian Park: Choosing A Driveway Gate That Fits Your Home

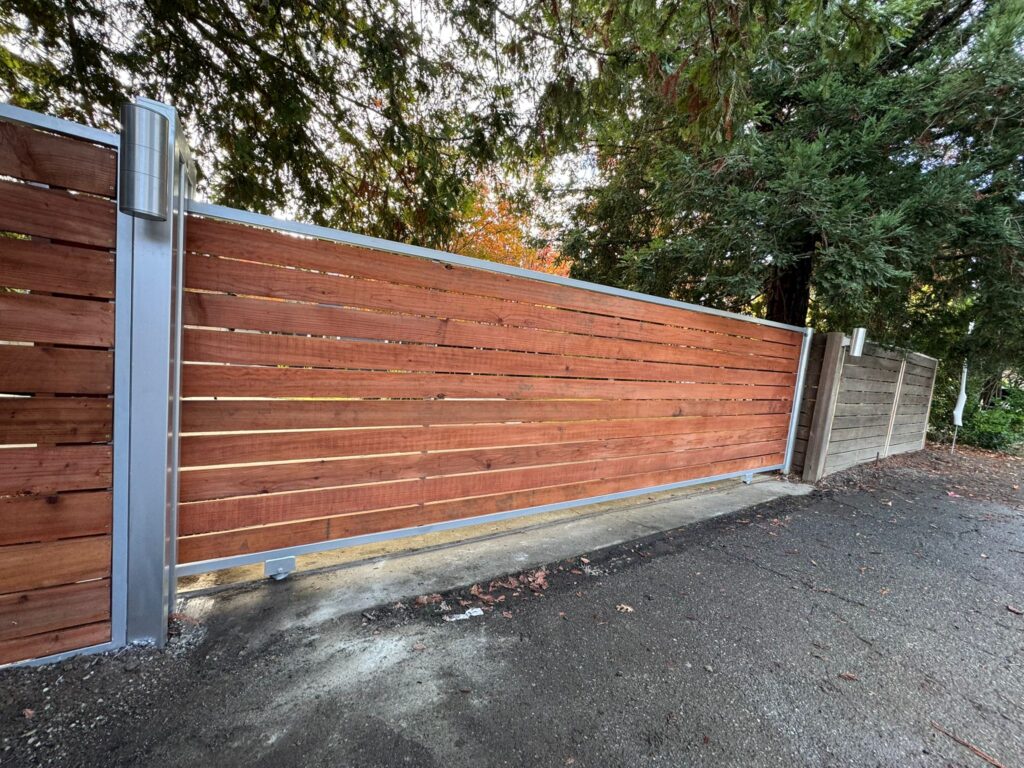
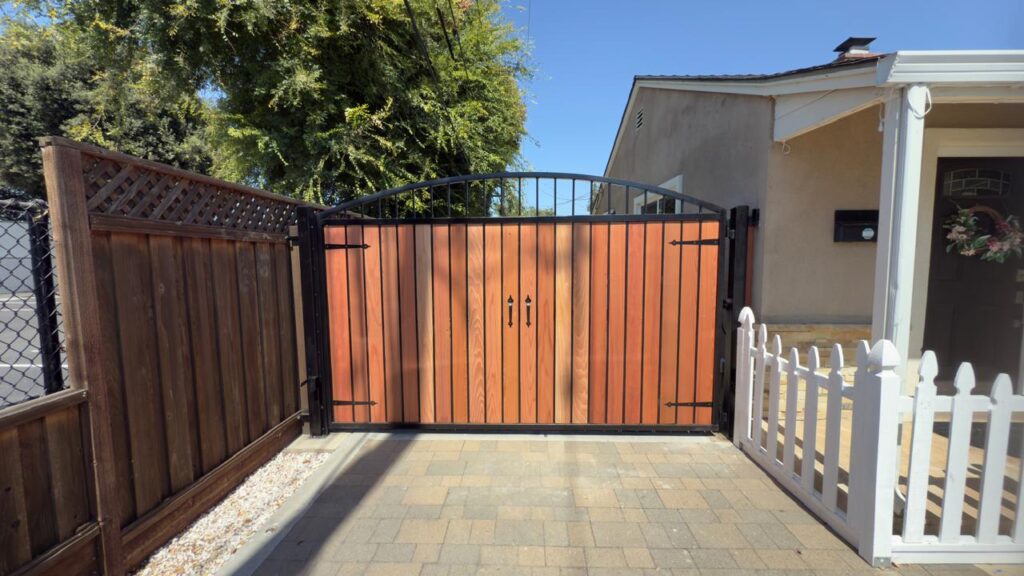
Blog & News Gate Installation Cambrian Park: Choosing A Driveway Gate That Fits Your Home jay jay Jun 29, 2026 Article, Uncategorized Cambrian Park homeowners usually start looking into driveway gates when privacy, security, convenience, deliveries, pets, or street-facing access becomes harder to manage. A careful Gate Installation Cambrian Park service should focus first on how the property functions. That includes the driveway layout, slope, vehicle waiting area, pedestrian entry, power access, safety devices, and everyday use patterns. That matters because many Cambrian Park homes sit on established residential streets with compact driveways, mature landscaping, side-yard fencing, and limited space between the garage, sidewalk, and street. A gate that looks right but opens the wrong way can create daily frustration. It may block parked cars, force drivers to stop awkwardly, interfere with deliveries, or strain the opener because the wrong movement style was chosen. The best gate is not always the most decorative one. It is the one that fits the property, works safely, and stays reliable through daily use. Start With The Driveway, Not The Gate Catalog A driveway gate has to match the site before it can match the home’s style. Two homes can use similar materials but need completely different systems because the driveway length, slope, side clearance, and access pattern are different. The First Question Is Vehicle Space Before choosing a swing gate or sliding gate, homeowners should look at where a vehicle waits while the gate opens. If the driveway is short, the gate may need to sit farther back from the sidewalk so the car is not left hanging into the street. If the driveway is narrow, the access-control keypad or intercom must be placed where the driver can reach it without backing up or turning sharply. A gate should make the property easier to use, not more stressful. If a driver has to stop in an awkward position every time, the system will feel inconvenient no matter how attractive it looks. Slope Can Change The Best Gate Type A sloped driveway can limit swing gate options. If the driveway rises toward the house, the bottom of a swing gate may scrape unless the design allows for clearance. If the ground slopes side to side, the gate frame and posts need careful alignment. A sliding gate may solve some slope issues, but only if there is enough side room for the gate to travel. Cambrian Park properties with tight side yards or landscaping should be measured carefully. Guessing the gate movement can lead to a system that looks good on paper but performs poorly after installation. The Main Gate Types Homeowners Compare Most residential gate projects come down to swing gates, sliding gates, or cantilever gates. Each option has strengths, but none works everywhere. Swing Gates Feel Traditional But Need Room Swing gates are popular because they create a classic residential entrance. They can be designed as single-panel or double-panel gates. Double swing gates can work well on wider openings because each panel is smaller and easier to move. The challenge is clearance. The gate needs a clear swing path. Parked vehicles, sloped pavement, planter beds, retaining walls, and walkway access can all affect whether a swing gate is practical. The posts also need to be strong enough to carry the weight over time. Sliding Gates Help With Tight Driveways Sliding gates move sideways, which can be useful when there is not enough driveway depth for a swing gate. A sliding gate may also be better when the entrance is close to the street or when vehicles park near the gate. A track sliding gate needs a clean track. Leaves, gravel, mud, and small debris can interfere with movement. A cantilever sliding gate avoids a ground track, but it needs more side clearance and stronger support posts. Cantilever Gates Solve Some Ground Issues Cantilever gates are supported by rollers and do not roll directly on a track across the driveway. This can help where debris, uneven pavement, or water movement would create track problems. The tradeoff is space. A cantilever gate needs additional room beyond the opening because part of the frame extends past the driveway to balance the gate.This option is often used on higher-use or more technical entrances, but it can work for residential properties when the layout supports it. Matching Gate Design To The Home A gate should look connected to the home, fence, driveway, and landscaping. It should not feel like a separate piece dropped onto the property. Privacy Gates Need Weight Planning Solid or semi-solid gates provide more privacy, but they also catch more wind and may weigh more than open-frame designs. Wood-infill, composite-infill, or solid metal gates should be planned with the operator capacity, post strength, and hinge or roller hardware in mind. A privacy gate can be useful for pets, children, street visibility, and noise reduction. However, privacy should not come at the expense of safe movement and reliable automation. Open Designs Keep Visibility Open metal gates, ornamental designs, and spaced picket styles allow more visibility. They can make the entrance feel less closed off while still controlling vehicle access. These designs are often lighter than solid privacy gates, which can reduce strain on automation hardware. Visibility can also help drivers see through the gate before it opens fully. That may be useful on tighter residential streets or shared access points. Smart Access That Does Not Become Complicated Modern gate access should be convenient, but it should also be manageable. The wrong access-control setup can become frustrating after installation. Keypads And Remotes Are Still Practical A keypad and remote-control setup may be enough for many single-family homes. Homeowners can open the gate from the car and provide a code when needed. The key is placing the keypad where drivers can use it safely. If the keypad is too close to the gate, too far from the driver’s window, or placed where vehicles must stop at a bad angle, daily use becomes awkward. Intercoms And Mobile Access

Gate Installation Cambrian Park: Choosing A Driveway Gate That Fits Your Home Read More »

How Gate Installation Campbell Supports Privacy, Safety, And Vehicle Flow

Blog & News How Gate Installation Campbell Supports Privacy, Safety, And Vehicle Flow jay jay Jun 29, 2026 Article, Uncategorized Campbell property owners are looking at driveway gates differently in 2026. A gate is no longer just a front-facing barrier for privacy. It has to support daily vehicle access, delivery movement, guest entry, emergency access, smart controls, safety sensors, and long-term mechanical reliability. A well-planned Gate Installation Campbell project should begin with the site layout, gate movement style, driveway slope, power access, safety devices, user access needs, and the frequency of daily gate openings. This is especially important in Campbell because many properties have compact driveways, established fencing, mature landscaping, narrow side yards, and residential streets where waiting space for vehicles matters. A gate that looks attractive but opens too slowly, swings into a tight driveway, blocks deliveries, or strains the opener can quickly become frustrating. The best installation plan treats the gate as a complete access system, not just a panel attached to posts. The First Decision: How The Entrance Actually Works A gate should match the physical entrance. Before selecting the design, homeowners need to understand how vehicles approach the property, where the gate can travel, and whether the site has enough space for safe movement. Vehicle Position Matters More Than Gate Style A gate may look perfect in a photo but fail on the property if cars cannot wait safely while it opens. On shorter driveways, the gate may need to be set back far enough for a vehicle to pull in without blocking the sidewalk or street. On narrow driveways, the design needs to account for turning angle, side mirrors, parked cars, and pedestrian paths. The entrance should be reviewed from the driver’s point of view. Can a vehicle stop comfortably while using the keypad or remote? Is there enough visibility? Does the gate open fast enough for the location? Can guests, delivery drivers, and service vehicles use the entrance without confusion? A driveway gate should create control, not traffic friction. Slope Changes The Gate Options Driveway slope is one of the most important technical details. A swing gate needs a clear opening arc. If the driveway rises sharply, the bottom of the gate may scrape unless the design is adjusted. If the slope runs across the driveway, one side of the gate may sit differently than the other. A sliding gate may work better where swing clearance is limited, but it needs side room. A cantilever gate avoids a ground track, but it requires more space beyond the opening. The right solution depends on grade, width, drainage, fencing, and how the gate will be used. Matching Gate Type To Campbell Properties Different gate types solve different problems. Choosing the right one early prevents many service issues later. Swing Gates For Classic Residential Entrances Swing gates are common on residential driveways because they create a traditional, clean entry. They can be single-swing or double-swing. A double-swing design can reduce the size and weight of each leaf, which may help the gate move more smoothly when the opening is wide. However, swing gates need strong posts, proper hinges, and a clear movement area. They also need the opener arms or underground operators to be matched to the gate size and weight. A poorly supported swing gate can sag, drag, or misalign with the latch and operator. Sliding Gates For Tight Driveways Sliding gates are useful when the driveway does not have enough depth for a swing gate. The gate moves sideways along the fence line instead of into the driveway. This can be practical for compact properties or entries where cars park close to the gate. Track sliding gates need a clean, stable track path. Leaves, dirt, gravel, and water can affect the track over time. Regular cleaning and drainage planning are important. If the property has enough side clearance, a sliding gate can offer consistent movement and strong access control. Cantilever Gates For Track-Free Movement A cantilever gate uses rollers and support posts instead of a ground track across the driveway. This can reduce problems from debris, uneven pavement, or water running across the entrance. The trade-off is that a cantilever gate needs more side clearance because the gate extends beyond the opening for balance. Cantilever systems are often considered for commercial, industrial, or higher-use sites, but they can also work in residential settings when the property layout supports the design. Smart Access Options Homeowners Are Asking About Automatic gates are becoming more connected. Homeowners want access that works for family members, visitors, delivery drivers, gardeners, cleaners, and emergency situations without giving the same permanent code to everyone. Keypads, Remotes, And Smartphone Control A basic automatic gate may use remotes and a keypad. More advanced systems may include smartphone control, cellular entry, camera intercoms, temporary codes, vehicle detection, and access logs. The best system depends on how many people use the gate and how often access changes. For a simple single-family home, remotes and a keypad may be enough. For homes with frequent deliveries or service providers, temporary access codes can reduce the need to share one permanent code. For larger properties, an intercom or camera-connected system may make visitor management easier. Temporary Codes Reduce Long-Term Access Risk A common mistake is using one gate code for everyone. Over time, that code may be shared with guests, workers, tenants, vendors, and neighbors. Once too many people know it, the gate loses part of its access-control value. A better approach is to use individual or temporary codes when the system allows. Codes can be changed after a project, tenant turnover, or service visit. This keeps the gate practical without making access management complicated. Safety Devices Are Not Optional Extras Automatic gates are moving systems. A gate can weigh hundreds of pounds and travel through areas used by vehicles, pedestrians, pets, and delivery workers. Safety devices help reduce risk and support reliable operation. Photo Eyes, Safety Edges, And Loops Safety photo eyes detect objects in the gate

How Gate Installation Campbell Supports Privacy, Safety, And Vehicle Flow Read More »

Photo Eye Troubleshooting For Gates That Open But Will Not Close

Blog & News Photo Eye Troubleshooting For Gates That Open But Will Not Close jay jay May 29, 2026 Article, Uncategorized When a gate opens but will not close, the motor may not be the real cause. The photo eye may be telling the gate that something is in the way. A small photo eye sensor helps the gate know when the path is clear, so even a small fault can stop the close cycle. This can be a real pain for homes and sites in California. A driveway gate that stays open can slow the day, leave the space open and make the automatic gate feel hard to trust. The good news is that many photo eye issues have clear signs. Photo Eye Alignment And Closing Failure A photo eye works with two parts. One side sends a beam. The other side reads it. When the beam is clear, the gate can close. When the beam is lost, the gate may stop, reverse or stay open. Bad sensor alignment is one of the most common causes. The gate may open just fine because the safety beam is mainly checked during the close cycle. If one sensor points even a little off line, the board may think a car, pet or person is in the gate path. Dirty Lenses Blocking The Sensor Beam Photo eyes sit near dust, soil, rain, bugs and yard work. The lens can get dirty fast. Dust, spider webs, mud, pollen and water spots can all block or weaken the beam. This may look like a major closing issue, but the cause can be simple. A soft cloth may clear the lens if the dirt is light. Still, if the gate fails again soon, the dirt may not be the only problem. Small things that can block the lens include: Spider webs: Thin webs can cross the beam path Mud spots: Splash from rain or tires can cover the lens Pollen film: Yellow dust can build up on the sensor face Water marks: Sprinklers and rain can leave spots after drying A clean lens helps the gate sensor read the beam in a clear way. If the lens is scratched or cracked, cleaning may not fix it. Sun Glare That Confuses Photo Eyes Sun glare can make a photo eye act strange. This often happens when the sun shines straight into the part that reads the beam. The gate may close in the morning but fail in the late day. The sensor may not be blocked by any real object. The driveway may be clear. The lens may be clean. Yet the sun can flood the sensor with bright light and make the beam hard to read. This is why timing matters. If the gate fails at the same time each day, glare may be the cause. A tech may change the angle, add a small shield or use a sensor that works better in that spot. Loose Posts Near The Gate Opening Photo eyes need a firm base. If the post, bracket or mount moves, the two sensors can fall out of line. Even a small shift can break the beam. Loose posts can come from soft soil, rust, weak screws or a light bump from a bin or tool. Wind and gate shake can also make a weak post move over time. The gate may work after someone touches the post, then fail again later. This kind of fault can be hard to spot. The sensor may look straight from far away. During gate repair, the mount should be checked along with the photo eye. If the post still moves, the same fault may come back. Landscaping Interference Around Sensors Plants and yard items can also block the beam. A branch may grow into the path. Grass can bend in front of the lens. Mulch, decor, trash bins or tools may sit just high enough to stop the signal. The sensor does not know what is in the way. It only reads that the beam is blocked. So the gate may stay open even if the item looks small or far from the gate. Common items that can block the beam include: Tall grass: Blades can bend into the sensor path Low plants: Leaves can grow across the beam line Trash bins: Bins can sit near the opening after pickup Yard tools: Rakes or brooms can lean into the path Decor pieces: Pots, lights or signs can block the beam Keeping the beam path clear helps the gate close when the space is safe. Looking for Affordable Garage & Gate Repairs? We offer quality service at competitive rates. Call (650) 912-1200 today to schedule your repair. Wiring Problems Behind Random Sensor Failure If the gate works one day and fails the next, the wiring may be the cause. Photo eyes need steady power and a clean signal. Loose, chewed, wet, corroded or cut wires can make the sensor fail only at times. Outdoor wires face heat, water, soil, bugs and pests. Wires may also get hit during digging, fence work, yard work or driveway repair. A small cut can let water in and cause rust inside the wire. This can make the gate opener seem bad even when it is not. The motor may have power, but the board may still get a bad photo eye signal. A proper sensor repair should check the wires, not just the lens. Controller Response To Blocked Beams The control board listens to the photo eyes. If the beam is blocked, weak or lost, the board may stop the gate from closing. This is part of gate safety. The board may act in a few ways. It may hold the gate open. It may let the gate start to close, then reverse it. It may flash a light, make a click or show an error code. This does not always mean the board is broken. It may only be doing what the sensor tells it to do.

Photo Eye Troubleshooting For Gates That Open But Will Not Close Read More »

Edge Sensor Issues In Homes With Narrow Gate Openings

Blog & News Edge Sensor Issues In Homes With Narrow Gate Openings jay jay May 29, 2026 Article, Uncategorized A small gate space can make each gate part work harder. When a home has a tight entry, close walls or a narrow driveway, the gate has less room to move in a safe way. An edge sensor can help the gate stop or move back when it feels pressure at the gate edge. RNA Automatic Gates helps California homes with gate parts, sensor issues and gate movement problems. If an automatic gate keeps stopping, moving back or refusing to close, the issue may be tied to the edge sensor, gate frame, wires or control box. Narrow Driveways And Sensitive Gate Edges A narrow gate space can leave very little room between the moving gate and a wall, post, car or fence. This makes the gate edge much more active during daily use. The edge strip may sit close to things that would not be an issue in a wider space. The sensor is made to help protect people, cars and the gate itself. When the sensor feels pressure, it sends a signal to the gate system. The gate may stop, move back or stay open. This is part of gate safety, but it can also cause stress when the gate reacts too often. A tight space does not mean the gate is bad. It means the gate must be set with care. The gate path, sensor spot, hinge or track and control settings all need to match the space. Small Clearance Problems That Trigger Reversals A gate may move back even when you do not see a clear block in the way. In a tight entry, small contact can be enough to set off the sensor. A trash bin, plant pot, parked car or side wall may sit too close to the moving gate. The issue may also happen when a car turns into the driveway at a slight angle. The gate may start to close, touch the car or come too close to it, then move back. This can seem random, but the gate may be reading light pressure from the edge strip. Even a small gap can change with wind, heat, loose parts or ground shift. A gate that cleared the side post last month may rub it now. That is why a small clearance issue can turn into repeat reversals. Misaligned Gate Panels In Tight Spaces A gate panel does not need to be badly bent to cause trouble. A small lean can press the sensor against a post, wall or driveway edge. In a tight space, that small shift may be enough to stop the gate. A gate can move out of line for many reasons. Hinges can wear down. Rollers can loosen. A track can shift. A post can settle. The gate may still look fine from far away, but its path may no longer be straight. When this happens, the gate sensor may not be the real cause. The sensor may only be doing its job. The real problem may be the gate panel, hinge, track or frame. Edge Sensor Wear From Frequent Contact Homes with narrow gate openings may see more bumps and scrapes on the sensor strip. Cars may pass close to it. Tools, bikes, bins or yard gear may hit it. The gate may also brush a wall or fence during use. Over time, this can wear down the sensor. The cover may crack. The strip may come loose. The inside parts may stop sending a clean signal. The gate may then stop at the wrong time or fail to read pressure when it should. Some signs of edge sensor wear include: Loose strip: The sensor pulls away from the gate frame Cracked cover: The outer layer shows cuts or splits Weak response: The gate reacts late or not at all False stops: The gate stops even when nothing touches it A worn sensor should be checked soon. It is part of the safety system, not just a small add-on. Driveway Angles That Affect Gate Movement The shape of the driveway can also affect sensor issues. A flat and straight drive gives the gate a cleaner path. A slope, curve or sharp angle can make gate movement harder. A sloped drive may bring the bottom of the gate closer to the ground in one spot. If the sensor is low on the gate, it may scrape the drive. This can make the gate stop or move back before it closes. A curved or angled driveway can also make cars stop too close to the gate path. The driver may need to turn in at a tight angle. This can place the car near the gate edge and make sensor contact more likely. Controller Faults From Edge Sensor Signals The gate controller reads signals from the sensor. If the controller reads a fault, it may stop the gate. It may also make the gate move back or refuse to close. This can make the issue look like a motor problem. The motor may still have power. The remote may still send a signal. The keypad may still work. But the control box may block the gate from closing because it thinks the edge sensor is active. This can happen when the sensor is pressed, when wires are damaged or when the system gets an odd signal. A technician can test the sensor strip, wire path and controller to find the real source of the fault. Looking for Affordable Garage & Gate Repairs? We offer quality service at competitive rates. Call (650) 912-1200 today to schedule your repair. Wiring Damage Along The Gate Frame The edge sensor needs clear contact with the gate controller. Wires carry that signal from the gate edge to the control box. If the wires are loose, pinched or worn, the gate may not act right. Wiring can wear down because the gate moves each day. A swing

Edge Sensor Issues In Homes With Narrow Gate Openings Read More »

Why Rain, Soil Movement And Pavement Cracks Can Disrupt Safety Loops

Blog & News Why Rain, Soil Movement And Pavement Cracks Can Disrupt Safety Loops jay jay May 29, 2026 Article, Uncategorized A gate may look simple when it opens and shuts. Yet many parts help it move the right way. One part is the buried wire that helps the gate know when a car is near it. These wires are often called safety loops, and they help the gate stop, hold open or move back when a car is in the way. Safety loops sit under the ground or inside cuts in the drive. This means rain, dirt, cracks and ground shift can hurt how they work. A small split in the drive can put stress on the wire. Water can seep into the cut. Soil can move under the slab. When this happens, the gate may get the wrong signal. That wrong signal can cause many gate issues. The gate may open again when it should shut. It may stay open too long. It may stop in the middle of the path. It may seem like the motor is bad, but the real issue may be the loop wire under the drive. Ground Conditions Beneath Safety Loop Wiring Safety loops work through wire that sits under or inside the drive. The wire helps make a field that can sense a car. Since the wire is under the surface, the ground below it must stay in good shape. If the soil or base moves, the wire can move too. A drive may look flat on top while the ground under it changes. Soil can sink, swell or wash out. Heat can make some parts expand. Heavy cars and trucks can press down on the same path each day. Over time, that weight can change how the ground holds the wire. When the loop wire bends or pulls, the gate may not read cars the right way. A weak wire path can also make the loop sensor send a poor signal. This is why a gate issue may start after wet weather, new cracks or new low spots in the drive. Rainwater Intrusion Around Loop Cuts Many gate loops are set inside saw cuts in the drive. The wire is placed in the cut, then the cut is sealed. The seal helps block water, dirt and grit. If that seal cracks or pulls away, rain can get into the wire path. Water may enter through old cuts, loose seal, broken pipe or small gaps near the gate. Once water gets in, the wire may send a weak signal. If the wire coat has even a small nick, wet weather can make the fault worse. The gate may work fine on dry days, then act strange after rain. This kind of rain damage can be hard to spot from the surface. The cut may look small, but water can sit inside it. When that happens again and again, the gate sensor may start to fail. The gate may stop, hold open or move back even when no car is in the path. Soil Shifting Under Driveway Surfaces Soil is not fixed in place. It can swell when wet and shrink when dry. It can also sink when water drains through it. These small changes can pull on a loop wire under a driveway gate. When soil shifts, the wire may bend or stretch. The shape of the loop may also change. Since the gate reads the loop field, a change in shape can hurt how well the gate sees cars. A small car or bike may be missed first because the signal is already weak. Soil shift is more likely near slopes, soft ground and places where water runs under the drive. It can also happen after years of use. If the drive has dips or raised edges, the loop wire may be under stress too. A full check can show if the gate issue is from soil, wire, seal or another part. Pavement Cracks That Break Sensor Paths Pavement cracks can do more than make a drive look old. A crack can cross the loop path and strain the wire. It can also open a place where water can get into the cut. When the crack grows, the wire may pull apart or lose its safe coat. At first, the gate may only act strange once in a while. It may miss a car, then work the next day. It may reverse at random. As the crack gets wider, the signal may get worse. This can make the gate act like the opener is weak, even when the motor still works. A loop path can fail when the wire breaks, when the seal fails or when water reaches the wire. A gate repair tech can test the wire to find the bad point. If the fault is in the loop, a loop repair may be needed instead of a new opener. False Safety Signals During Wet Weather A wet loop wire can make the gate think a car is in the way. This is called a false signal. The gate is trying to stay safe, but it is using bad data. That can cause the gate to act in ways that do not match what you see in the drive. Wet weather may cause the gate to: Stay open when the path is clear Stop before it shuts all the way Reverse as soon as it starts to close Open with no car near the gate These signs can affect gate safety because the gate no longer has a clear read of the path. It may also make the site less secure if the gate will not close. When this starts after rain, the loop wire, wire cuts and control box should be checked. Gate Reversal Problems After Heavy Rain A common sign of loop trouble is a gate that starts to close, then opens again. This can happen when the gate thinks a car is in the path. The

Why Rain, Soil Movement And Pavement Cracks Can Disrupt Safety Loops Read More »

How Gate Repair Can Fix Exit Loop Detection Issues

Blog & News How Gate Repair Can Fix Exit Loop Detection Issues jay jay May 29, 2026 Article, Uncategorized When a gate does not open well for cars leaving a home or lot, the motor may not be the real cause. The issue may come from the exit loop system under the drive. This buried wire tells the gate when a car is there and ready to leave. A weak signal can make an automatic gate slow, late or hard to trust. RNA Automatic Gates helps homes and sites in California find out if the issue comes from the exit loop, the gate opener, the loop detector or another part of the system. Early Signs Of Weak Exit Loop Response A weak exit loop can start with small signs. The gate may still open, but it may take too long. A car may need to stop in one exact spot before the gate moves. You may also see the gate miss cars at times. One car may pass with no issue. The next car may sit there with no gate movement. This can mean the loop sensor is not sending a clean signal. These signs should not be ignored. A small delay can turn into a gate that will not open from the exit side. Gate repair can help find the weak part before the system gets worse. Vehicle Size Changes That Affect Gate Detection A loop sensor reads metal over the loop. A large truck is often easy for the system to see. A small car, golf cart or bike may not make the same strong signal. This can be a problem when the exit sensor is set too low. It may work for large cars but fail for light ones. That can make daily use hard for homes, staff, guests or tenants. The sensor may also miss cars if the loop is too deep. New paving or soil shift can change the space between the car and the wire. A tech can test the signal and set the loop detector to fit the cars that use the drive each day. Underground Wire Breaks Beneath The Driveway The exit loop wire sits under the drive. It may be under concrete, asphalt or pavers. This keeps it out of sight, but it also makes wire breaks hard to see. Over time, heat, rain and soil movement can hurt the wire. Heavy cars may add stress. Cracks in the drive can pull or bend the wire. Even a small break can stop the gate sensor from working well. A wire break may cause these issues: The gate will not open from the exit side The gate works only at times The detector shows a fault or weak signal The gate opens with a remote but not with the exit loop A tech can test the wire before any cut work starts. This helps show if the wire can be fixed or if a new loop is the better choice. Control Board Confusion From Bad Loop Signals A bad loop signal can make the gate opener look like the problem. The gate may stop, open late or move in odd ways. This can happen when the control board does not get clear input from the exit loop. The control board uses signals from many parts. It may get input from a keypad, remote, timer, safety device and loop detector. If the exit signal is weak, the board may not know if a car is there. This is why gate repair should not stop at the motor. The motor may still be fine. The real issue may be the exit sensor, wire path or detector module. Driveway Repairs That Disturb Exit Loop Wiring Driveway work can hurt an exit loop. Saw cuts, trench work, new asphalt and new concrete can all affect the wire. A crew may not know where the loop is buried. Repaving can also change the way the loop works. If more material is added over the wire, the loop may sit too deep. The signal may then become too weak for small cars. Common work that may disturb loop wire includes: Concrete cutting near the gate lane Asphalt grind work or repaving Trenching for drains or lines Paver removal or base work Crack repair that reaches the loop cut If the gate stops working after driveway work, the loop should be tested. The issue may not be the whole automatic gate system. Gate Timing Problems After Loop Sensor Failure A bad loop sensor can also affect gate timing. The gate may open late. It may not stay open long enough. It may start to close too soon.This can be unsafe when a car is still near the gate. A driveway gate needs clear timing so cars can move through with less risk. If the gate does not read the car, the control board may start the next step too fast. A weak loop can also make the gate stay open too long. The system may think a car is still there. This can slow traffic and leave the site open longer than needed. False Openings From Electrical Interference Some loop issues do not stop the gate from opening. They make the gate open when no car is there. This can be caused by signal noise, bad wire, poor ground or nearby power lines. The loop detector is made to read a set signal. When other noise gets into the line, the system may think a car is on the loop. The gate may then open at odd times. Loose parts can also cause false signals. Moisture, rust and heat can affect wires in the gate box. A tech can check the loop wire, ground and control box to find where the bad signal starts. Looking for Affordable Garage & Gate Repairs? We offer quality service at competitive rates. Call (650) 912-1200 today to schedule your repair. Exit Loop Testing During Gate Repair Exit loop testing helps find the

How Gate Repair Can Fix Exit Loop Detection Issues Read More »

Converting Manual Ranch-Style Gates to LiftMaster Swing Automation

Blog & News Converting Manual Ranch-Style Gates to LiftMaster Swing Automation jay jay Feb 23, 2026 Article, Uncategorized On rural properties where trenching power is expensive or messy, some owners choose a battery-supported setup like Liftmaster solar gate openers to keep a swing system running without a long underground run. A ranch gate that works fine by hand can behave very differently once a motor moves it every day. Automation repeats the same motion at the same speed and force, so hinge wear, post lean, and slight frame twist stop being “minor.” A durable ranch gate automation plan starts with the gate as a mechanical structure, then adds the operator, wiring, safety devices, and access tools in a way that matches ranch traffic patterns. RNA Automatic Gates, a Gate and Garage Door Repair and Installation company serving California, approaches each swing gate retrofit as a whole system. That includes the gate’s geometry and the power delivery, not just the operator model. Ranch Gate Reality Check: Weight, Span, and Swing Physics A swing gate is a lever. As leaf length grows, the load at the operator climbs quickly, even if the gate only feels “a little heavier” by hand. Material choices matter too: a pipe frame with open rails moves differently than a wood-faced leaf that carries weight farther from the hinge line. Before picking an operator, measure the leaf length, estimate true weight (including skins and hardware), and test how freely the gate moves through its full swing. If it drags, binds, or speeds up downhill, that friction shows up as slow travel, nuisance stops, and faster wear once the motor takes over. A clean manual gate conversion starts with a gate that already swings smoothly. Post and Hinge Integrity: Automation Exposes Weak Links Sag becomes a daily problem. A latch-side droop that you lift by hand becomes a consistent scrape or stall under power. Hinge play turns into misalignment. Worn barrels and loose pins let the leaf shift, which changes limits and stop contact. Post flex shows up as chatter. If the hinge post moves, the operator pushes a moving target and hardware fatigue follows. Frame twist creates mid-swing binding. A racked gate can swing freely at one angle and bind hard at another. Gate hinge reinforcement often fixes the root cause. Common upgrades include bearing hinges, thicker hinge plates, gussets, backing plates, and correcting hinge axis alignment. Footings matter more than most owners expect. Shallow or cracked footings allow lean and reintroduce sag even after hinge work. Operator Selection Logic: Linear vs. Articulated for Ranch Geometry LiftMaster swing systems generally fall into two mechanical styles: linear actuators (straight push-pull) and articulated arms (jointed sweep). The “best” choice is usually the one that fits your post layout, hinge setback, and desired opening angle without forcing awkward bracket placement. Linear actuators fit well when the hinge pivot is close to the inside face of the post and the operator can push at a strong starting angle. They are straightforward to service and pair nicely with stiff steel ranch gates. Articulated arms tend to work better when hinges are set back on thick wood posts, masonry columns, or decorative builds where a linear actuator would start the swing at a weak angle. If you hear people ask for a “liftmaster ranch gate,” what they usually want is a LiftMaster swing operator applied with correct geometry and enough headroom for ranch conditions. Mounting Geometry: The Triangle That Determines Everything Gate mounting geometry is three points. Hinge pivot, post bracket, and gate bracket form the working triangle. Bad geometry causes slow starts. A shallow push angle at the beginning lacks leverage to overcome hinge friction. Bad geometry causes late-swing strain. Brackets placed incorrectly can bind near closed or hit stops too hard. Opening angle changes the math. A 90-degree swing and a 110-degree swing can require different bracket distances. Driveway crown and grade affect load. The gate may feel light at one angle and heavy at another, depending on terrain. Mark the swing arc. A simple chalk line can reveal high spots, fence conflicts, and where the leaf flexes. Treat the triangle like the foundation. When gate mounting geometry is right, tuning is simpler and service calls drop. Power Planning for Long Driveways: Voltage Drop and Trenching Strategy Long rural runs turn wiring into the make-or-break item. The operator can be perfectly sized and still act erratic if voltage at the gate drops under load. That is why “just extend the wire” creates recurring faults: slow movement, random resets, false obstruction stops, and batteries that never charge correctly. Solid driveway gate power planning starts with real distance measurements, conductor sizing for the load, and a conduit route that can be serviced later. For trenching, use conduit sized for pulls and future add-ons, with long-sweep bends and accessible junction points. Keep splices out of buried “mystery spots” and inside rated boxes with service access. If your project requires long run wiring, design it like utility work: correct gauge, clean terminations, moisture protection, and separation of high voltage and low voltage pathways where practical. Solar-Assist Options: When Off-Grid Becomes the Cleanest Choice Distance is the main trigger. When trench length makes copper and labor spike, solar can be cheaper and cleaner. Hardscape crossings push projects toward solar. Asphalt, concrete, rock, and drainage features raise trench complexity. Cycle count needs to match battery capacity. Moderate daily use is easier to support than constant traffic. Accessory load matters. Keypads, long-range receivers, loops, and intercoms add draw that must be budgeted. Panel placement must avoid shade. Morning and afternoon shading can cut charging more than owners expect. Batteries are the buffer. More storage smooths cloudy stretches and reduces voltage sag under load. A solar gate option is still an engineered power plan. It succeeds when the site, usage, and equipment are sized to match. Latch and Stop Engineering: Closing Without Slamming or Drift A motorized swing gate needs predictable endpoints. Without mechanical discipline at open and closed,

Converting Manual Ranch-Style Gates to LiftMaster Swing Automation Read More »

Access Control Integration for LiftMaster Swing Gate Openers in Commercial Settings

Blog & News Access Control Integration for LiftMaster Swing Gate Openers in Commercial Settings jay jay Feb 23, 2026 Article, Uncategorized Liftmaster swing gate openers can be a strong foundation in California commercial sites, but the operator alone does not create a smooth entry lane. The real performance comes from how credentials, controllers, operator inputs, safety devices, detection, and power are tied together. At RNA Automatic Gates, we see the same failure pattern: the gate hardware is fine, but the integration choices create double-triggers, missed opens, nuisance cycling, and safety devices that get bypassed when traffic spikes. This guide shows a practical way to build liftmaster access control that feels deliberate, tracks events cleanly, and protects people and equipment. Integration Blueprint: Defining the Credential-to-Gate Path Every commercial gate access system needs a clear, written signal path: reader to controller to operator input to motion, with safety devices able to interrupt motion when needed. When that path is vague, teams “patch” issues by adding extra relays, extending pulse times, or shortening timers, and the lane starts behaving unpredictably. A clean blueprint starts with deciding who owns each decision. The access platform should decide whether entry is allowed (valid credential, correct schedule, correct group), and the operator should decide how the gate moves (open profile, close timing, obstruction handling). When both systems try to run timing, the gate tends to feel twitchy: open commands stack, close timers restart randomly, and troubleshooting becomes guesswork. Credential Ecosystem: Cards, Fobs, PINs, Mobile, and Mixed Modes Commercial sites rarely stay single-credential for long. Tenants want keypad gate entry, employees want a badge, managers want mobile access, and visitors need an intercom gate system. Mixed modes can work without admin chaos if enrollment and removal stay centralized. A simple rule helps: keep one identity record per person, and attach multiple credentials to that identity. That way, revoking access is one action, not a scavenger hunt across a keypad list, an app portal, and a separate card database. It also keeps reporting clean, which matters later when you need to confirm who entered during a dispute or after an incident. In practice, many sites run cards or fobs for staff, PINs for tenants or vendors, mobile for managers, and intercom release for guests. The key is avoiding “shadow systems,” where a vendor still has an old PIN even after their card was removed. Gate Operator Interfaces: Dry Contact, Relay Logic, and Input Hygiene Most LiftMaster swing operators accept a dry-contact trigger input. That sounds straightforward, but “easy wiring” is where swing gate integration problems often start. Bad relay discipline creates intermittent failures that only show up during peak traffic or bad weather. The most common mistakes are holding a relay closed too long, stacking multiple relays in series, or letting noise into long cable runs that cross pavement or fencing. When that happens, the operator may interpret one access grant as multiple commands, or it may ignore commands sporadically. The fix is usually boring but effective: use a true dry contact, keep the access output momentary, label and terminate wiring cleanly, and isolate long runs with proper protection. Timing Architecture: Strike, Hold-Open, and Anti-Tailgate Coordination A gate that “feels intentional” is mostly about timing alignment. Users notice when a credential is granted but the gate hesitates, or when the gate starts to move and then stops and restarts as if it is second-guessing itself. The goal is one access event leading to one motion decision. Typically, the access system sends a single short pulse, the operator begins a predictable open cycle, and then the close sequence is governed by presence logic and a close timer that only starts when the lane is clear. That setup reduces chatter, reduces wear, and keeps traffic flowing. Anti-tailgating is where many sites accidentally create chaos. When teams try to stop tailgating by shortening close timers, they often increase nuisance cycling and cause more unsafe behavior. A better approach is detection-driven logic: expect a vehicle after a valid grant, watch for lane occupancy, and require a new credential once the “expected entry window” ends. This keeps enforcement consistent without turning the lane into a pinball machine. Safety Interlocks in Commercial Traffic: Preventing “Access Wins Over Safety” Safety should never be treated as optional. A gate safety interlock strategy is what prevents a valid credential from becoming an unsafe move. In the real world, busy lanes push people toward shortcuts, so the system has to make safety automatic and hard to bypass. For swing gates, the highest-risk zones are the sweep path, the closing zone, and pinch points near posts and hinges. Monitored photo eyes and monitored safety edges are the workhorses here. When correctly installed and configured, they protect people and vehicles without hurting throughput. The throughput problems usually happen when safety devices are misaligned, not monitored, or wired in a way that hides faults. Then the site starts “living with it” instead of fixing it. Vehicle Detection Layers: Loops, Probes, and Presence Logic Detection is what keeps commercial lanes from closing on vehicles and what prevents the gate from cycling for no reason. A vehicle loop sensor (or equivalent detection device) needs to match the lane geometry and the way vehicles actually approach. Most commercial setups work best with layered detection, usually an approach function plus a presence function. Approach detection can arm logic or trigger exit behavior, while presence detection prevents closing when a vehicle is still in the lane. If presence is unreliable, you will see the two worst symptoms: gates that close too aggressively, and gates that stay open because the system thinks something is still there. Loop tuning matters more than many people expect. If the sensitivity is wrong, high-clearance vehicles can be missed, or nearby metal and electrical noise can trigger false occupancy. That is where nuisance cycling starts. Audio/Video Entry Systems: Intercom Latency and Gate Control Discipline Intercom systems add a human decision in the middle of the process, and humans introduce delay. If the

Access Control Integration for LiftMaster Swing Gate Openers in Commercial Settings Read More »

Industrial Gate Installation Los Gatos

Preventing Sand Intrusion Damage in Cayman LiftMaster Gate Systems

Blog & News Preventing Sand Intrusion Damage in Cayman LiftMaster Gate Systems jay jay Feb 23, 2026 Article, Uncategorized Coastal installs in Cayman, California often rely on LiftMaster operators configured for salty air and wind exposure, like the setups we work on every week at RNA Automatic Gates – including Liftmaster gate openers cayman as a common reference point when matching an operator to gate size and duty cycle. Sand isn’t just a cosmetic nuisance. On coastal properties, fine grit rides the wind, slips into tiny gaps, and turns normal motion into a slow grind. This guide lays out practical sand intrusion prevention steps for cayman gate systems, with a focus on LiftMaster operators in coastal conditions. Sand as an Abrasive System: Why “Fine” Becomes Fatal Beach sand looks harmless because it’s small. That’s the problem. Micron-sized particles behave like lapping compound when they mix with lubrication and moisture.What sand does inside a gate system: Bearings: Grit scratches races and balls/rollers, raising friction. Heat builds, grease breaks down, and the bearing starts to howl. Gears and sprockets: Abrasive paste forms when sand mixes with oil or tacky grease. Tooth profiles wear, backlash grows, and alignment gets sloppy. Seals: Sand cuts seal lips and O-rings. Once a seal is scored, it stops being a barrier and starts being an entry point. Rails and rollers (sliders): With sliding gate sand, the track becomes sandpaper. Rollers flatten or chip, and the gate begins to chatter. Add humidity and salt mist and you get a one-two punch: abrasion plus corrosion. That combo is how corrosion sand damage turns a “working gate” into a stalled gate with a burned motor or stripped drivetrain. Ingress Path Audit: The Hidden Doorways for Grit Most sand problems come from predictable pathways. A fast audit helps you target fixes that actually last.Common entry points on LiftMaster operators and gate assemblies: Motor housing seams and covers that don’t seat flat Vents that pull air straight through the cabinet Conduit runs that slope toward the operator Cable glands that are oversized, cracked, or missing inserts Hinges, idlers, and chain/rack zones exposed to direct wind Control enclosures with warped doors, tired gaskets, or missing latch tension Bottom track packed with sand that gets thrown upward into rollers and guides Quick field check: Wipe a finger along the inside lip of the operator door and around wire entry points. A gritty film inside the cabinet means the enclosure is “breathing” sand. Look for sand piles under the cover. That usually traces back to a vent path, conduit path, or a gasket that no longer compresses. This audit step matters for gate motor protection because most motors fail after contamination starts upstream. Sealed Enclosures Done Right: IP Thinking Without the Buzzwords You don’t need fancy terminology to make smart enclosure choices. You need two outcomes: keep grit out keep the box serviceable without tearing seals every visit Practical gate enclosure sealing tactics: Choose a cabinet that closes square. A stiff door with a solid latch compresses the gasket evenly. Warped doors create a high-spot/low-spot leak. Use the right gasket profile. Flat foam tape works for light dust, but coastal sites often benefit from a formed gasket that rebounds after repeated openings. Seal around fasteners. Loose screws and missing washers become micro-leaks. Stop “field notches.” If someone cut a corner to pass a wire, that’s now a sand funnel. Patch properly and re-route through glands. Plan a service loop. Give wiring slack inside so techs don’t yank cables through seals during troubleshooting. A good enclosure is part of liftmaster coastal longevity. It also reduces nuisance faults caused by dirty limit sensors, photo eyes, and accessory boards. Airflow Discipline: Venting That Filters Instead of Feeding Operators generate heat. Some airflow is normal, especially in full sun. The goal is to cool without pulling in grit.Better venting approaches for coastal sites: Baffled vents: A simple baffle forces air to turn before entering. Sand carried on wind has momentum, so turns help drop particles before they reach electronics. Filtered vent inserts: Use a filter medium that can be swapped on a schedule. A clogged filter is better than sand inside the cabinet. Vent placement: Avoid vents facing the prevailing wind. Side placement under a lip or shield cuts direct sand blast. Maintain clearance: Keep landscaping, fences, and debris from blocking airflow. Blocked airflow can overheat electronics and shorten capacitor and relay life. Conduit, Glands, and Drip Loops: Sand’s Favorite Highways Wiring pathways are a top cause of contamination, especially when conduit runs act like a chute. Routing and termination habits that cut intrusion: Slope conduit away from the operator whenever possible. Use drip loops on any cable that enters a cabinet from above. Water and sand ride the same path. Match gland size to cable OD. An oversized gland “looks tight” but leaks around the jacket. Use gland inserts for multi-conductor bundles instead of cramming through one hole. Seal unused knockouts with proper plugs, not tape. Avoid straight-line conduit into the cabinet at ground level. A short riser plus a lateral entry reduces direct sand migration. Done right, this single change can cut internal grit by a huge margin and supports long-term gate motor protection. Track and Run Zone Hygiene: Cleaning That Doesn’t Re-Deposit Grit Cleaning is easy to do wrong. High-pressure air or water often pushes sand into rollers, guides, and bearings. Better track cleaning methods for sliding systems: Start with dry removal: Use a stiff nylon brush and a shop vac to lift sand out of the track, not along it. Wipe rails and guides with a damp microfiber cloth after vacuuming. This grabs the remaining fine film. Low-pressure rinse only when needed and only after dry removal. If you rinse first, you make abrasive slurry. Mind the roller pockets: Clean around roller brackets and guide posts where sand packs and hardens. If the gate has a V-track or wheel track, keep an eye on “black paste” buildup. That’s worn metal plus sand plus lubricant

Preventing Sand Intrusion Damage in Cayman LiftMaster Gate Systems Read More »

When Track Alignment Fails: Diagnosing LiftMaster Sliding Gate Performance Issues

Blog & News When Track Alignment Fails: Diagnosing LiftMaster Sliding Gate Performance Issues jay jay Feb 23, 2026 Article, Uncategorized Liftmaster sliding gate openers are built to move heavy panels smoothly, but even a strong operator will struggle when the rolling system is fighting the track. In Walnut Creek, California, RNA Automatic Gates sees a common pattern: the opener gets blamed, while the real culprit is track alignment drifting out of spec and forcing the gate to drag, chatter, or bind.Below is a field-style diagnostic guide for when track alignment fails and your sliding system starts acting up. Symptom Mapping: The “Sound Signature” of Misalignment  Sliding gates talk – mostly through noise. Matching the sound to the mechanism cuts the troubleshooting time fast. Grinding along the run often points to track contamination plus a roller that is no longer centered in the V or U channel. If the sound changes at the same spot every cycle, suspect a localized track dip, cracked weld tab, or a roller flat spot. Clicking is commonly a roller climbing over a seam, fastener head, or dented lip. It can also come from a loose guide assembly tapping the frame. Chain slap (or rack chatter) may look like a track problem, but it can be a drive line issue. A loose chain, bad idler, or mismatched pitch can cause rhythmic impact that echoes through the frame. Motor strain (deep hum, slow start, heat) is the operator pushing through friction. That friction can come from gate binding issues, over-tight guides, or track geometry that forces side-load into the rollers. If you’re working on a liftmaster slide gate and the sound suddenly spikes near mid-run, treat that as a red flag for alignment under load, not just a dirty track. Track Geometry Under Load: Straight When Empty, Crooked When Moving  A gate can look “fine” while parked and still run crooked under motion. When the panel starts moving, weight transfers between rollers, the frame twists slightly, and posts can flex. That is when hidden geometry problems show up.What to check: Sightline test with movement: Watch the leading edge gap to the fence line while the gate travels. If the gap opens and closes, the track is not holding a consistent path, or the gate frame is racking. Stringline or laser along the track: A static straightedge can miss a sag between supports. Use a taut stringline or laser and measure offsets at multiple points. Load reveal: If the gate pulls harder right after start, the rear roller set may be dropping into a low spot. If it pulls hardest near the end, the track may be climbing or the stop is fighting the operator. This is the core of sliding gate alignment work: confirming the track path while the system is loaded, not only when it’s sitting still. Roller Path Integrity: Flat Spots, Coning, and Side-Load Scars  Rollers are “wear recorders.” The wear pattern tells you what the track and frame have been doing for months.Look for: Flat spots on slide gate rollers: Often caused by a gate left parked under heavy load on a damaged section of track, or by a roller skidding because the path is pinched. Coning (tapered wear): Indicates the roller is consistently riding off-center, usually from a track that’s not plumb relative to the gate plane or from guides pushing the gate sideways. Side-load scars on roller faces or bearings: A sign the gate is being forced laterally, commonly from tight or mispositioned gate guide rollers, or from a track that’s twisted. If you replace rollers without correcting the geometry, the new rollers inherit the same abuse and fail early. Foundation Drift and Post Shift: The Slow Motion Gate Failure  Most track problems in the field start as small foundation movement. A footing that settles 1/4 inch can turn into a gate that binds hard in one zone.Common causes in Walnut Creek-style conditions: Soil expansion and contraction across seasons Minor vehicle bumps that nudge a post out of plumb Concrete cracking at an anchor cluster Erosion or washout near a support point As posts drift, the guides follow the posts, the gate gets squeezed, and the operator starts running hotter. That gradual rise in friction is a classic path to operator overload.A practical check: put a level on both posts, then measure the clearances at the guides and along the run. If clearances look inconsistent, don’t assume the operator is “weak.” The structure may be moving. Rack/Chain Line Truthing: When Drive Components Lie  Many “track” complaints are really drive-line misalignment. A rack or chain that is offset can pull the gate sideways, creating drag that mimics track damage.Key failure modes: Pitch mismatch: Wrong rack segment or chain type causes irregular engagement. You’ll hear a repeating clunk or chatter. Offset: The pinion is not centered on the rack, or the chain line is not parallel to travel. This side-loads the gate as it moves. Mounting height errors: Too high or too low makes the operator climb the rack, lifting the gate slightly and unloading rollers, then dropping them back down. This is where rack chain alignment matters. A straight rack line with the wrong height can still cause binding, and a perfect height with a crooked line can still pull the frame sideways. Gate Frame Squareness: Racking That Steals Momentum  A sliding gate frame that’s out of square acts like it has “random” tight spots. What’s happening is diagonal distortion: one corner leads, then the frame twists, and a mid-run pinch point forms.Checks that work: Measure diagonals corner-to-corner. If they don’t match, the frame is racked. Watch the top gap at the guide zone. If it changes as the gate moves, the frame is twisting or the guide alignment is forcing it. Inspect welds at corners and mid-rails for cracking or separation. A racked frame often creates slide gate vibration because the guides keep correcting the gate’s path, then releasing it, over and over. End Stops and Limits: The “Overtravel” That Eats

When Track Alignment Fails: Diagnosing LiftMaster Sliding Gate Performance Issues Read More »